The greatest advantage of working with Git is having our code hosted on a server so that all team members can work on the same project in parallel.
Setting up our project
Once we have created our Xcode project and set up our repository as seen in Introducing Git, we will create a repository on BitBucket. BitBucket is the platform I have chosen for this example, but you can use GitHub, GitLab, or any other similar platform.
To create a repository on BitBucket:
- Create an account and log in at BitBucket.org.
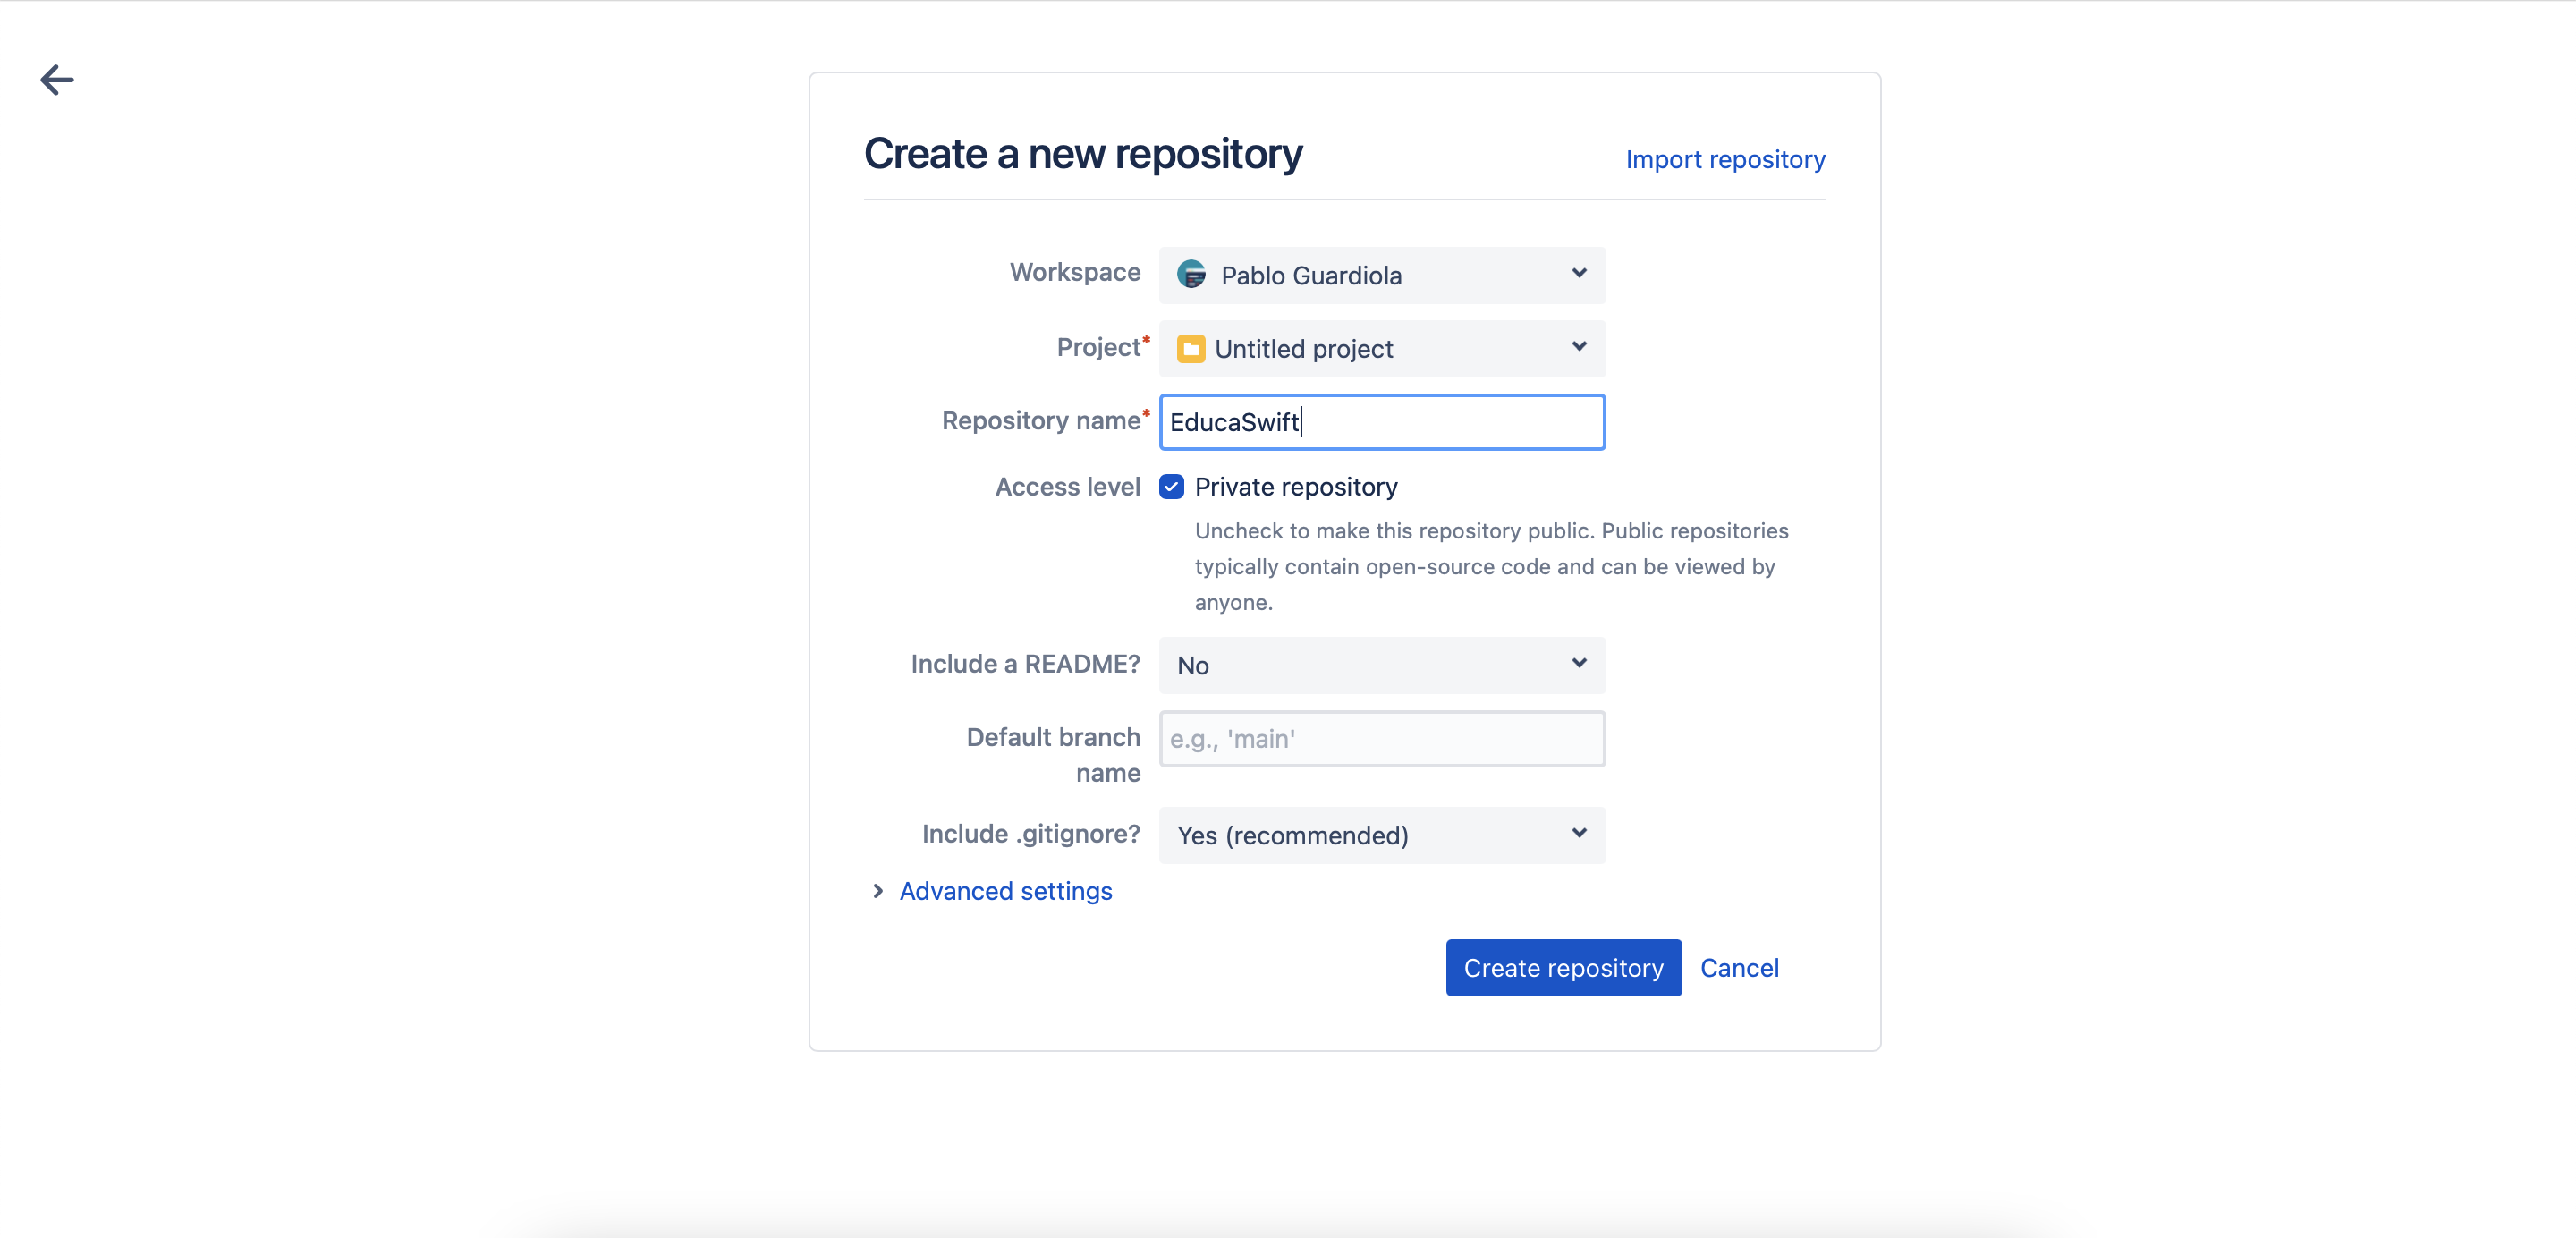
- Click on the "+" icon, and fill in the details by specifying the project name (or a new one) and the name you want to assign to your remote repository.
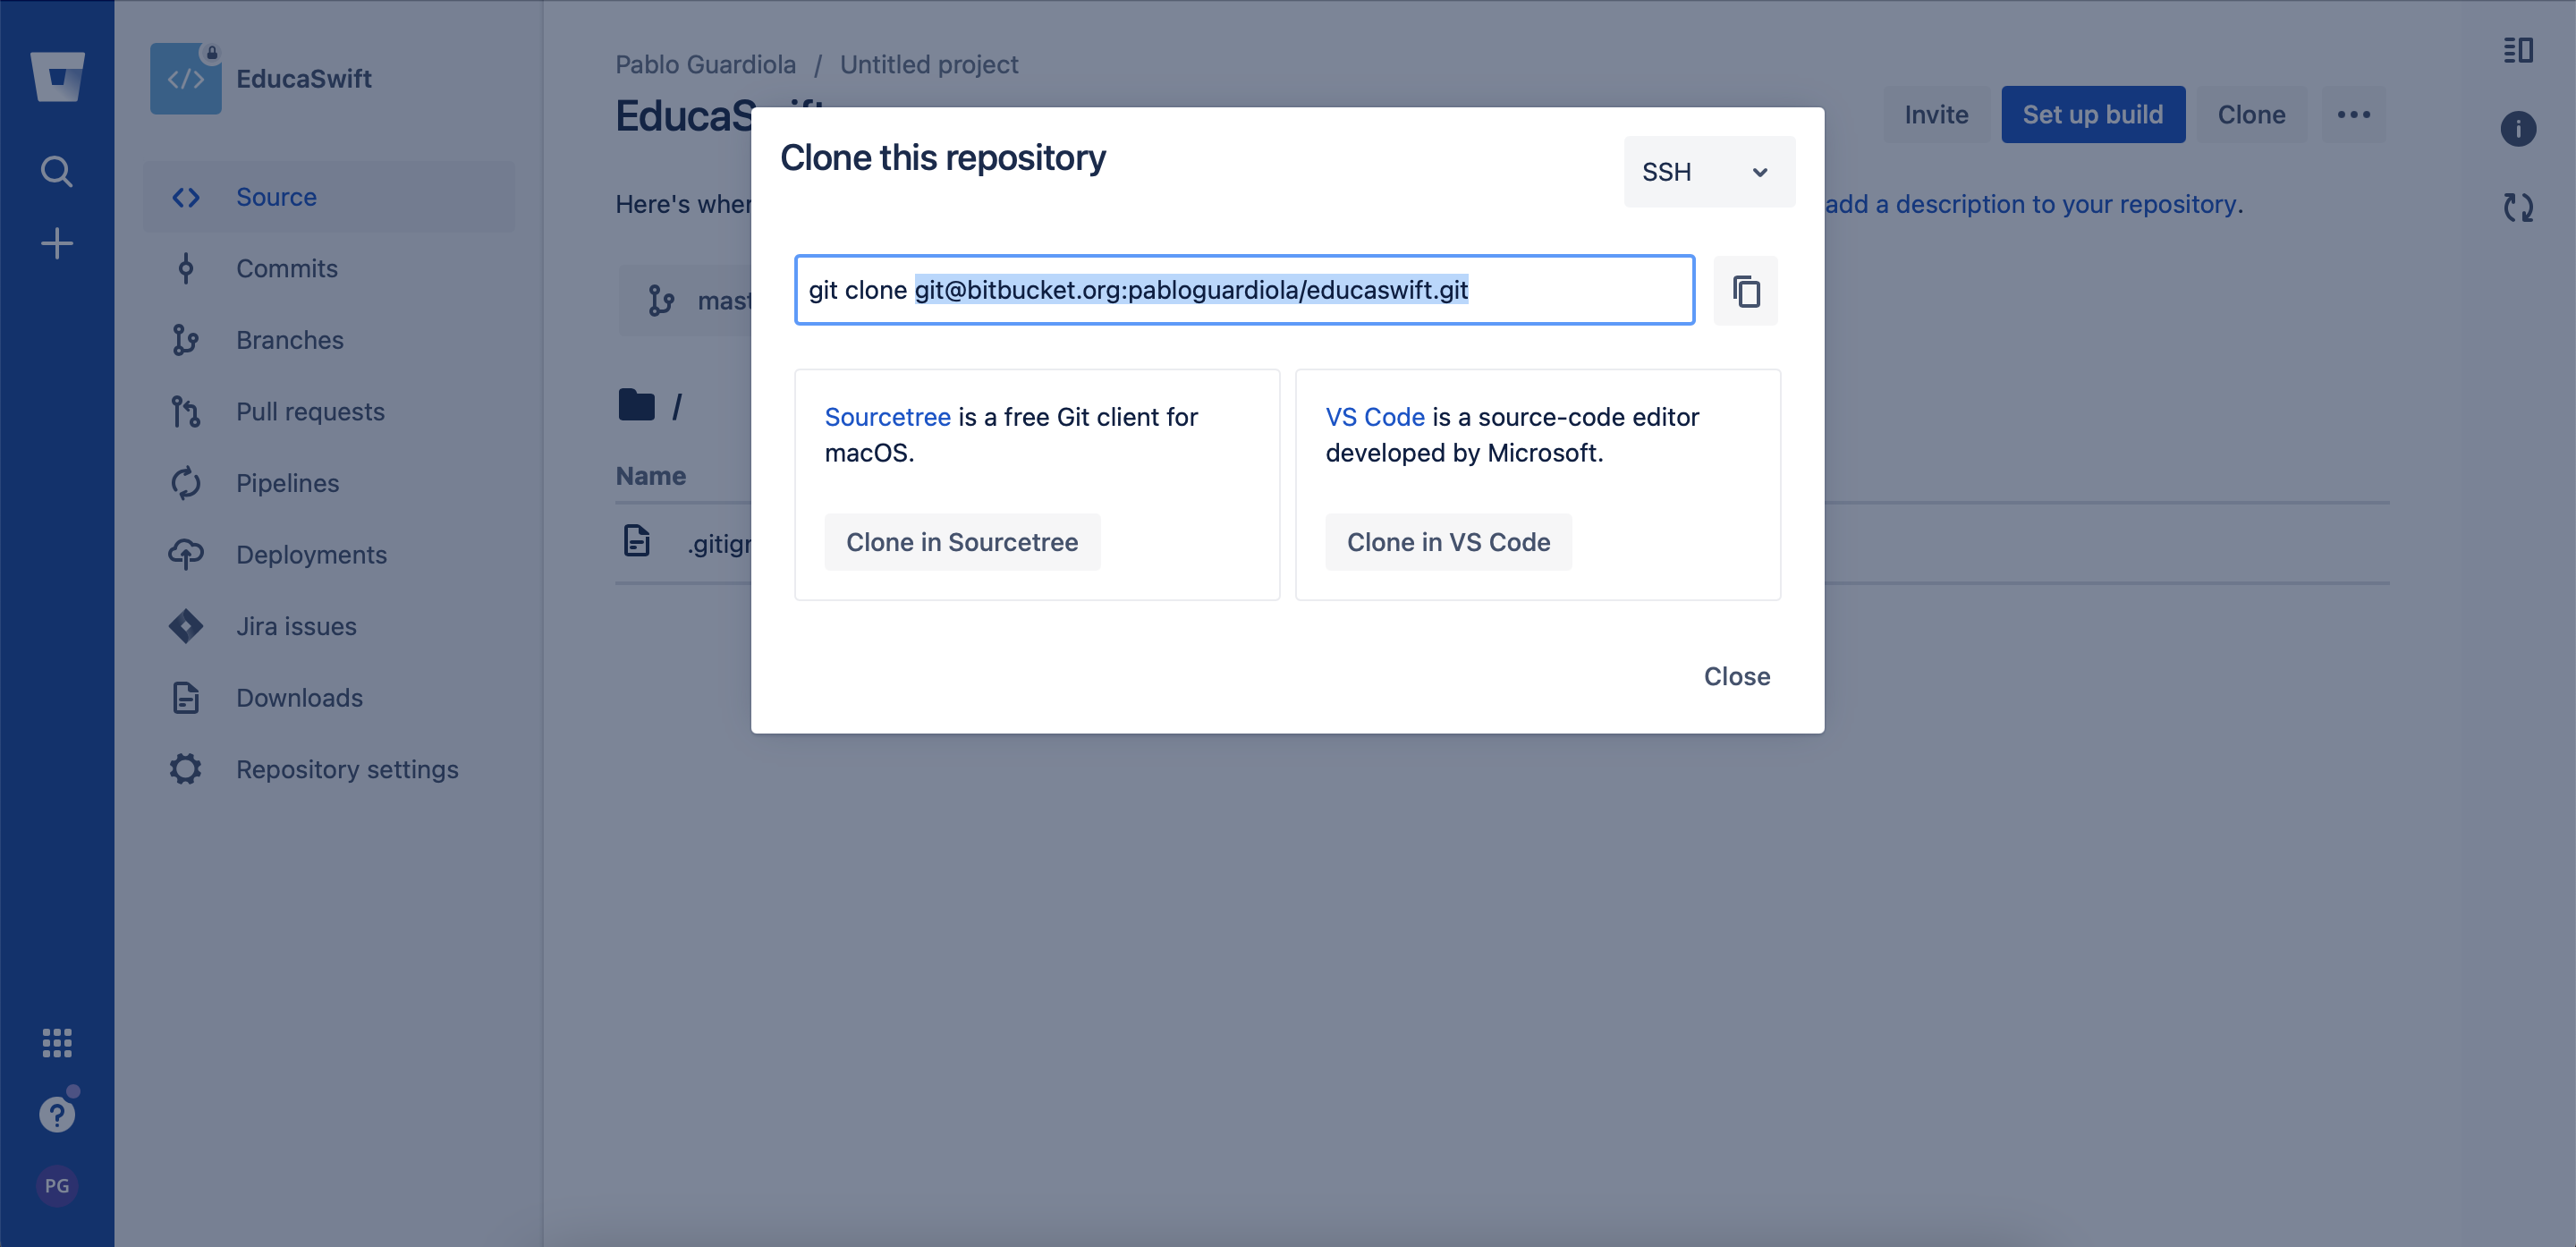
Once our remote repository is created, we can click on the Clone button, which will reveal the URL we need. Select the SSH option and copy the URL.
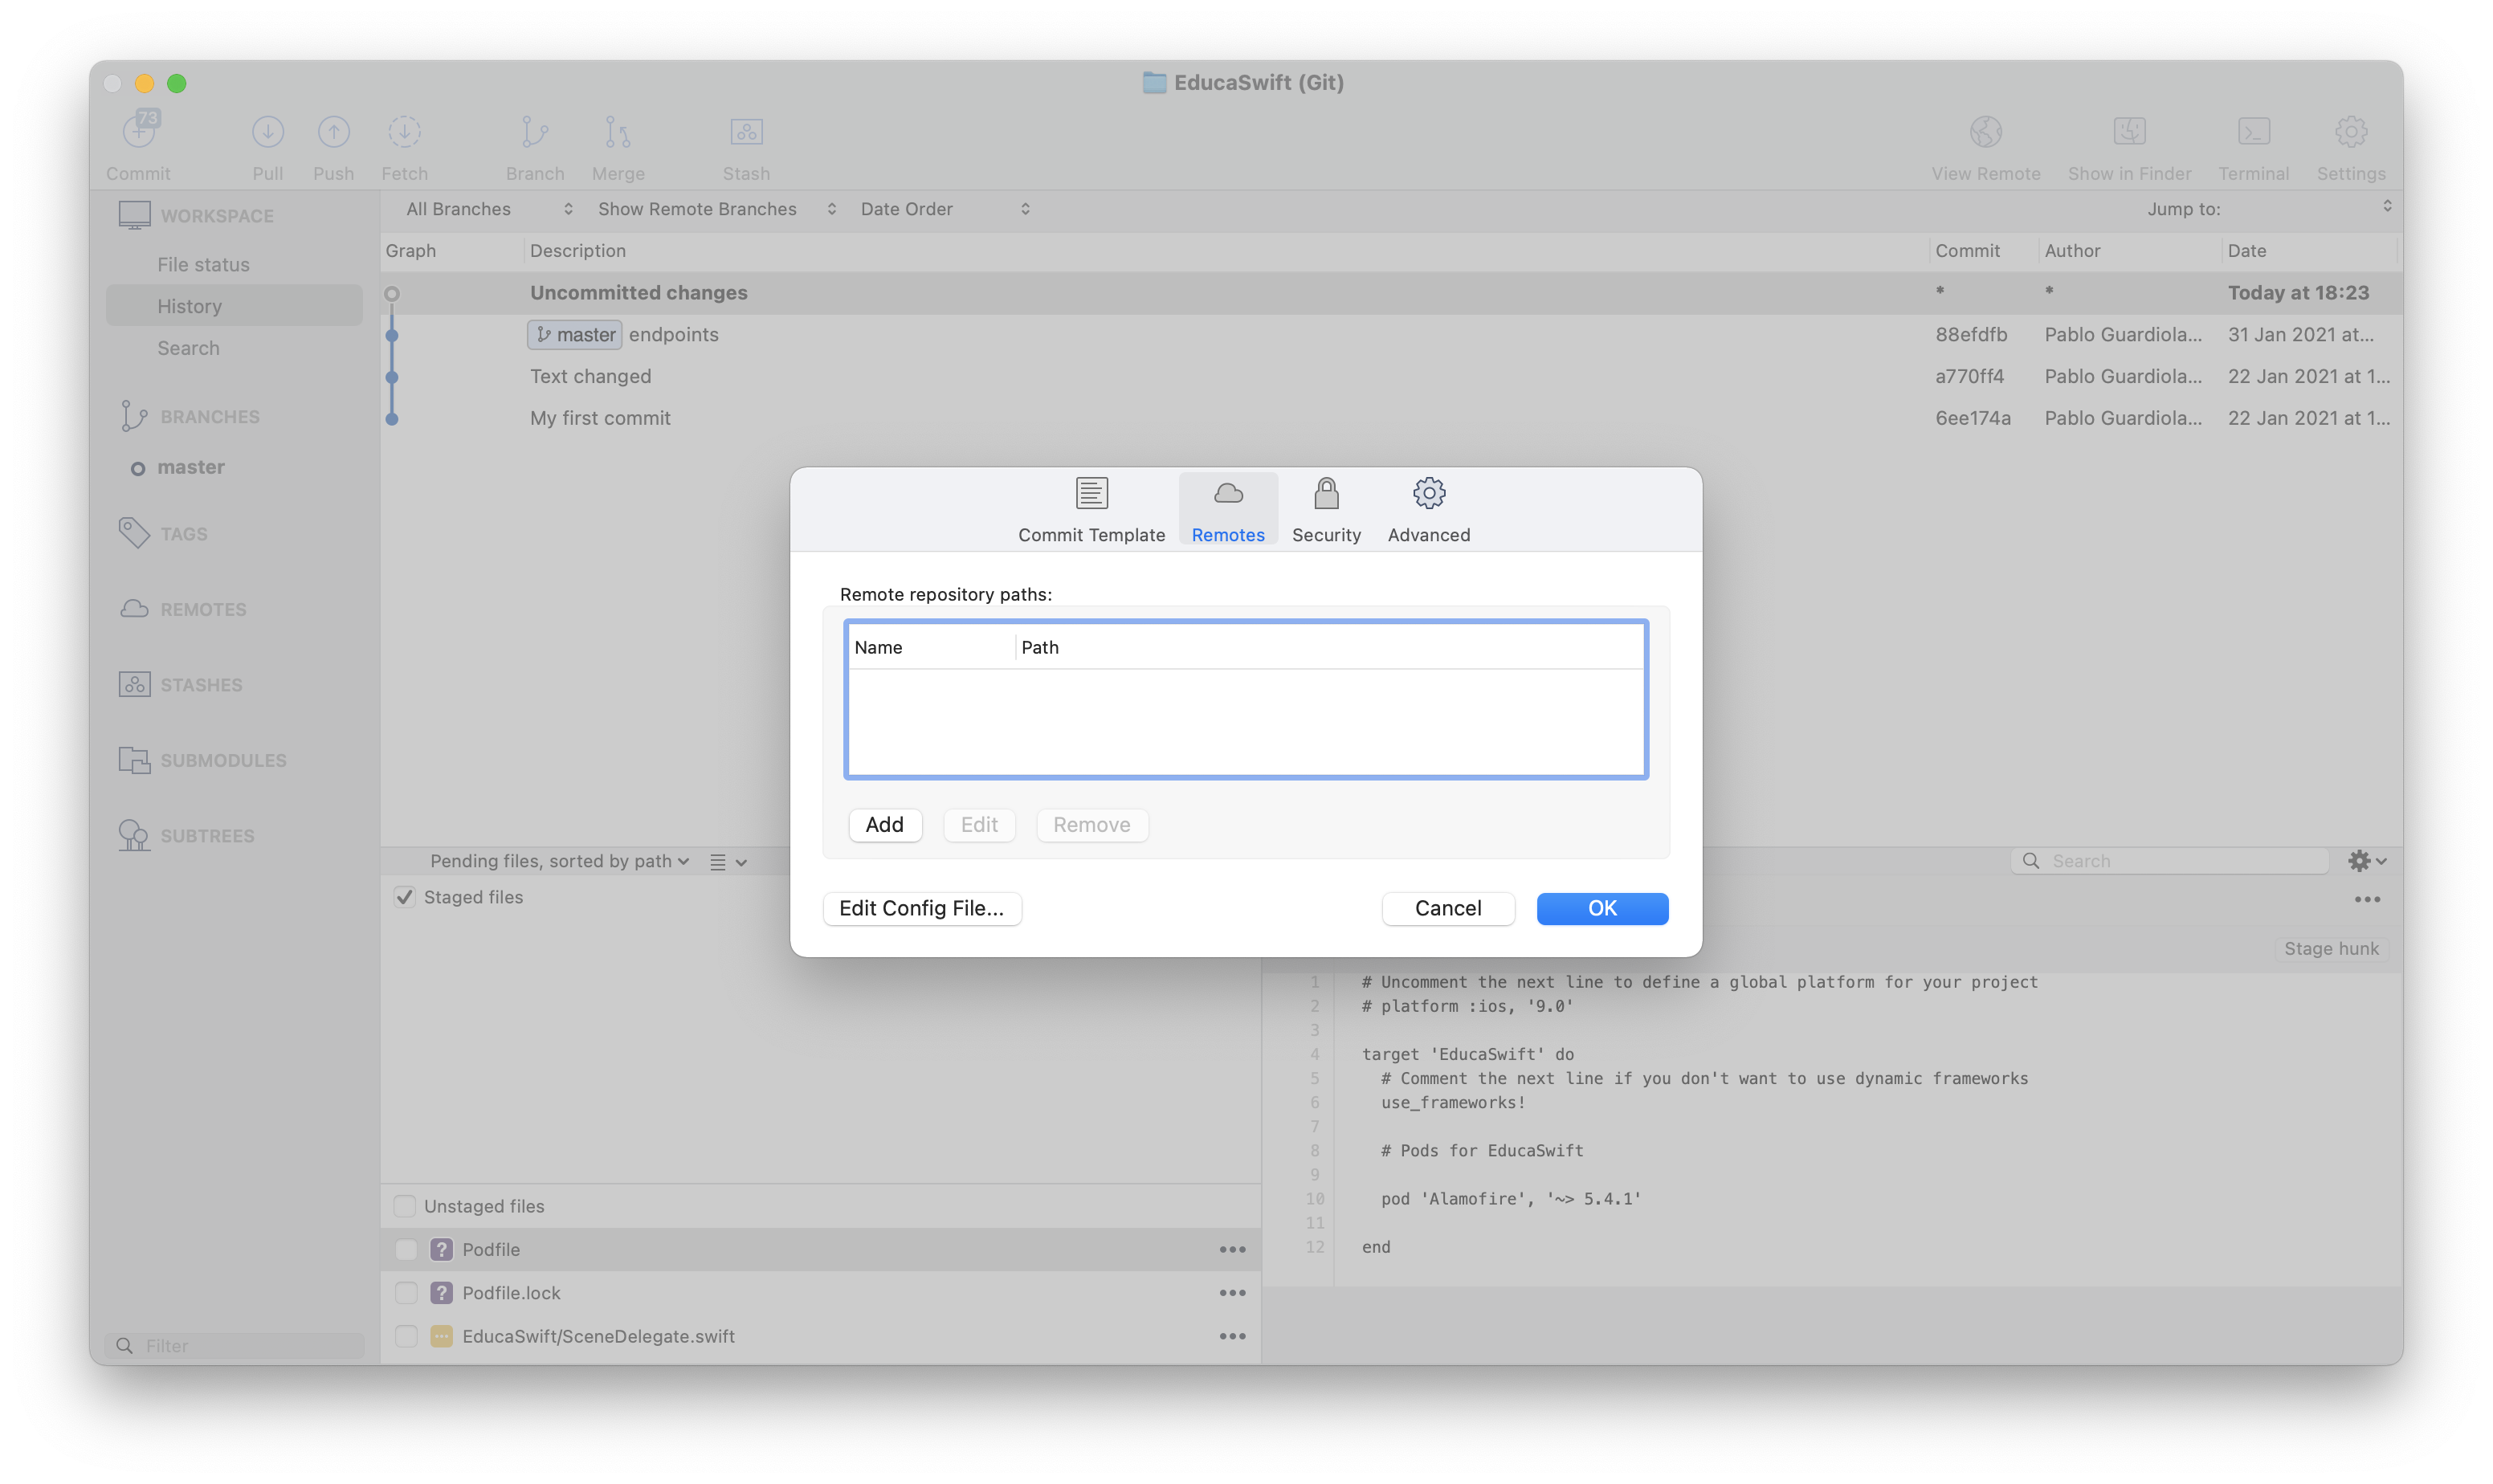
Go back to SourceTree, and click on Repository -> Repository Settings.... In the dialog that opens, select the Remotes tab.
Click on Add, and in the new dialog define a name and paste the URL that we copied.
Click OK in the dialogs to finish our setup.
Creating our SSH key
An SSH key is used instead of a username and password to upload and download changes from the repository to our computer.
The steps to create this connection are:
- Generate the SSH key on our terminal.
- Add this key to our BitBucket account.
1. Generate the key
First, we will generate an SSH key on our computer by running the following command. (This step is not necessary if you already have a generated key).
ssh-keygenPress Enter for all the questions that appear, and once generated, copy it with the command:
pbcopy < ~/.ssh/id_rsa.pub2. Assign the key to your account.
In BitBucket, go to the SSH Keys section, click on the Add key button, and paste the key we copied in the previous step. Finally, click Add key.
Push
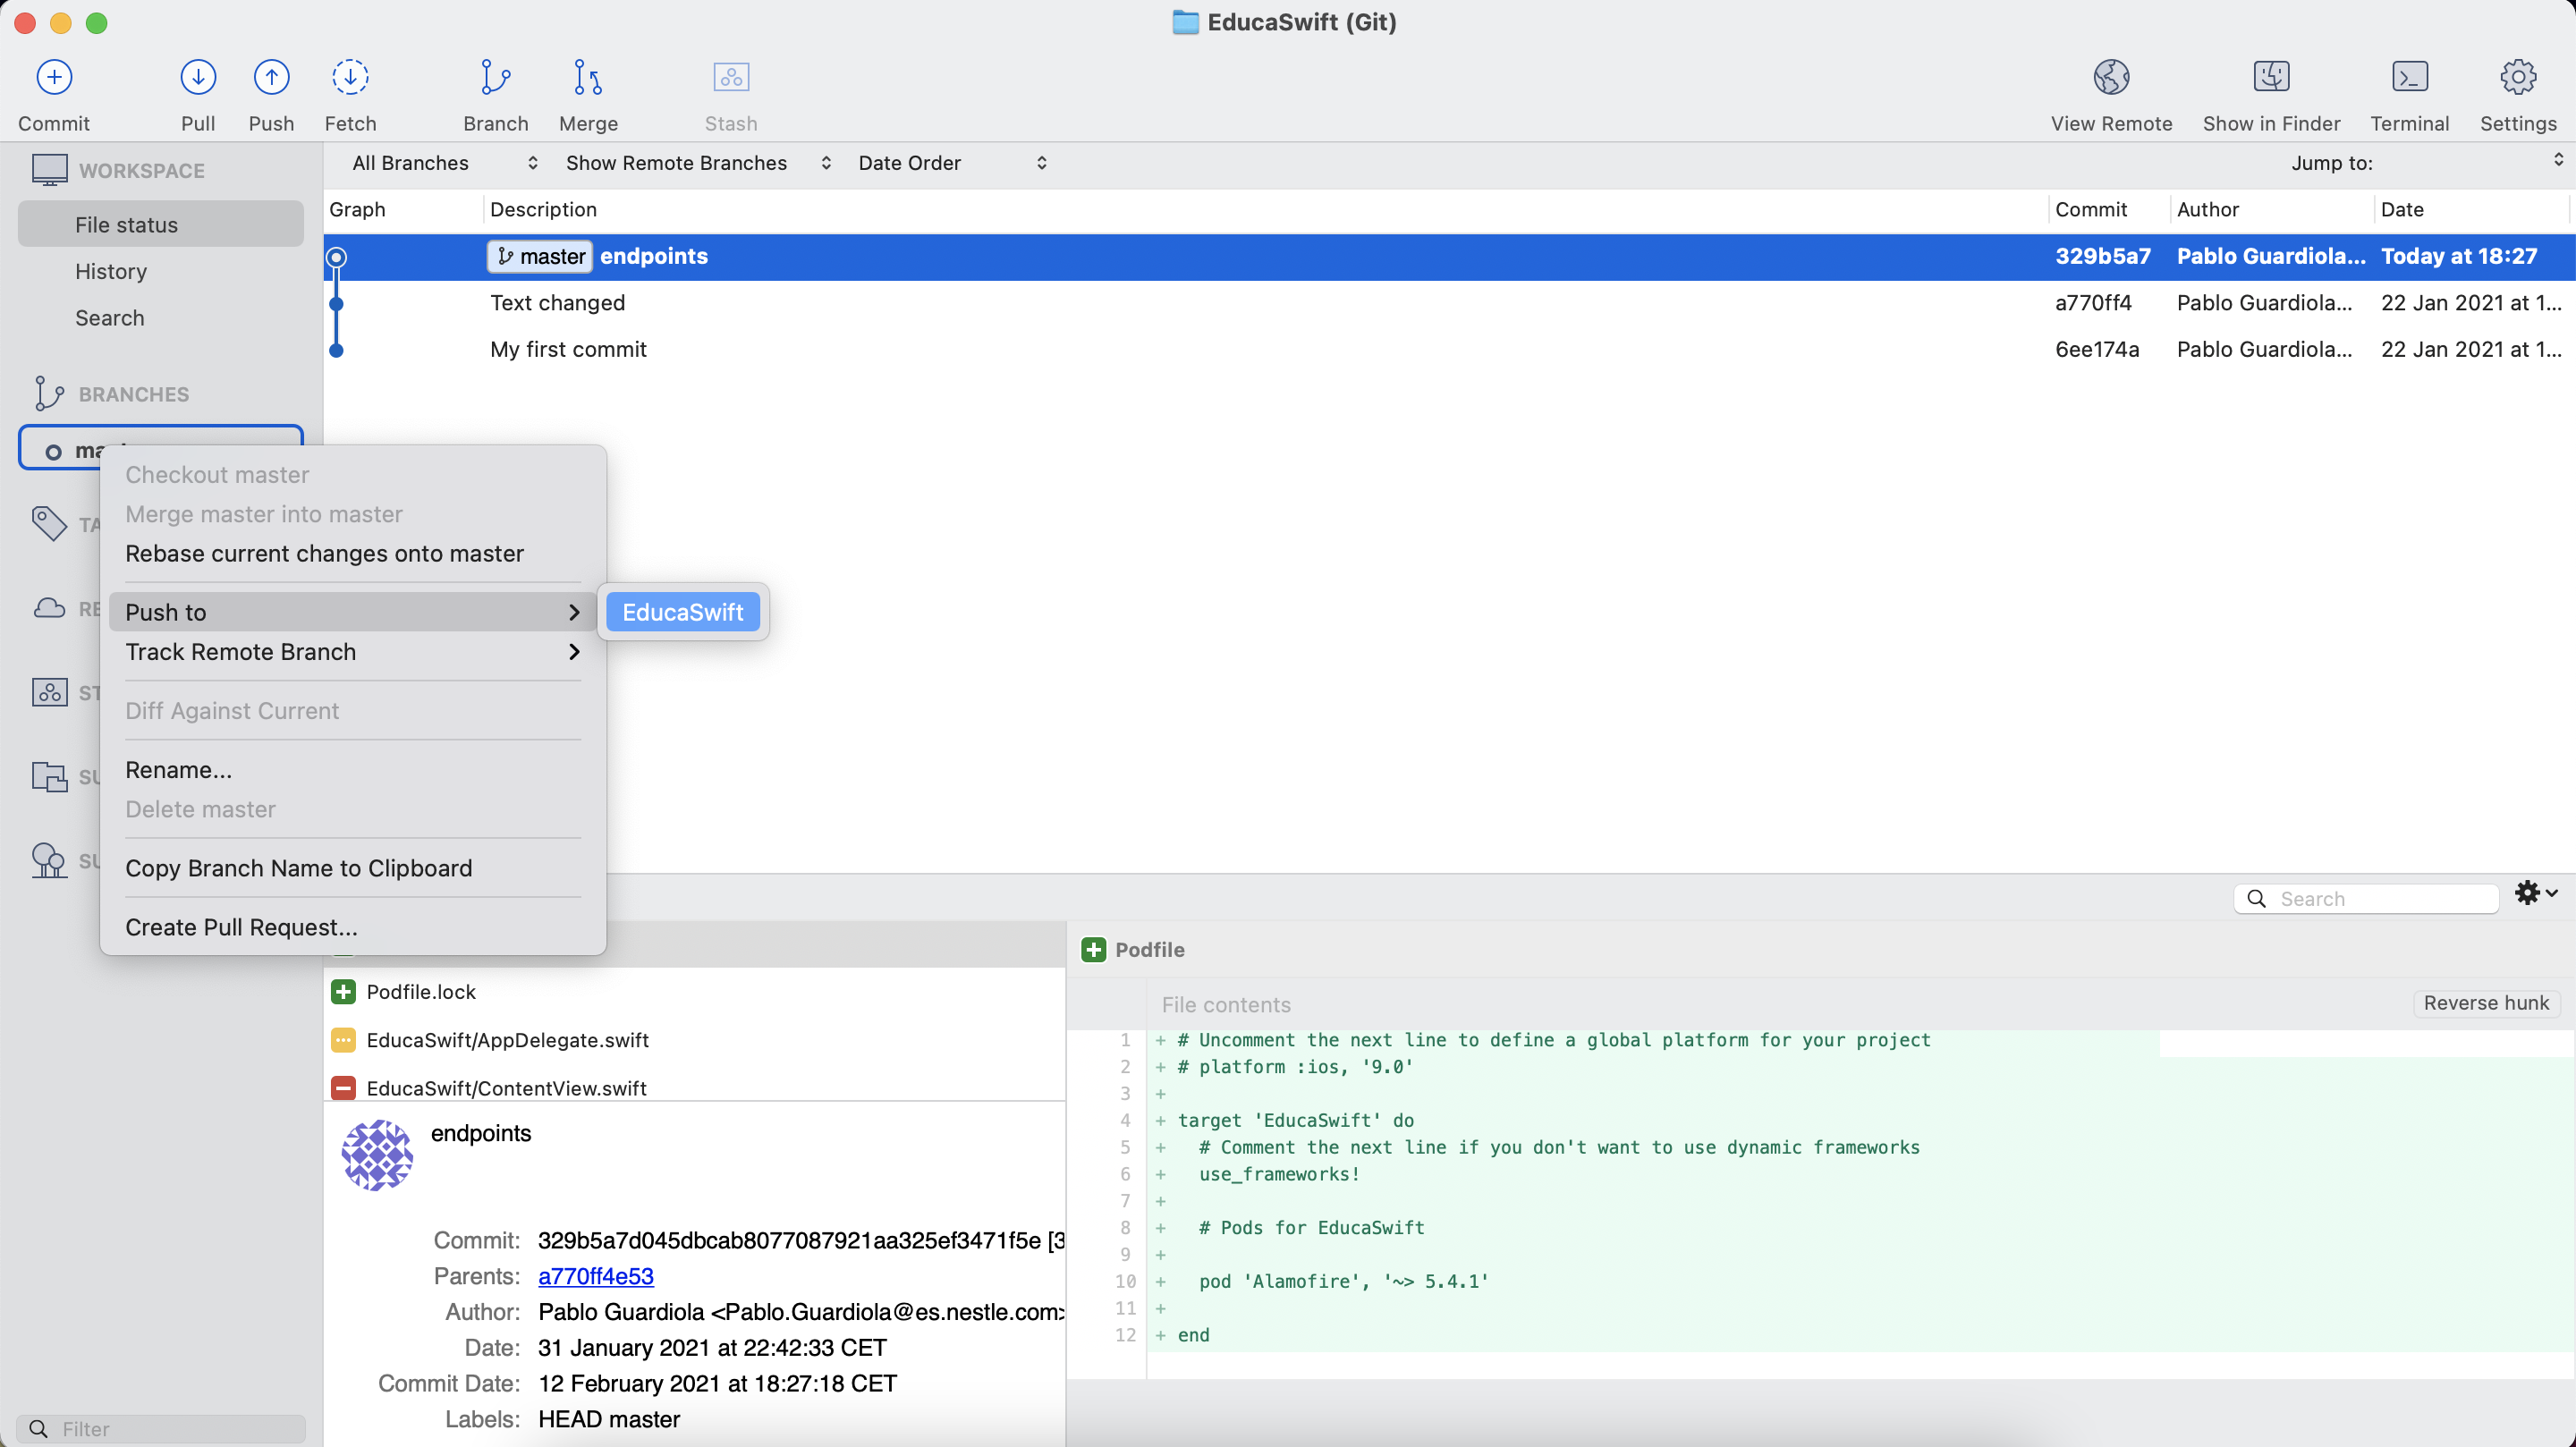
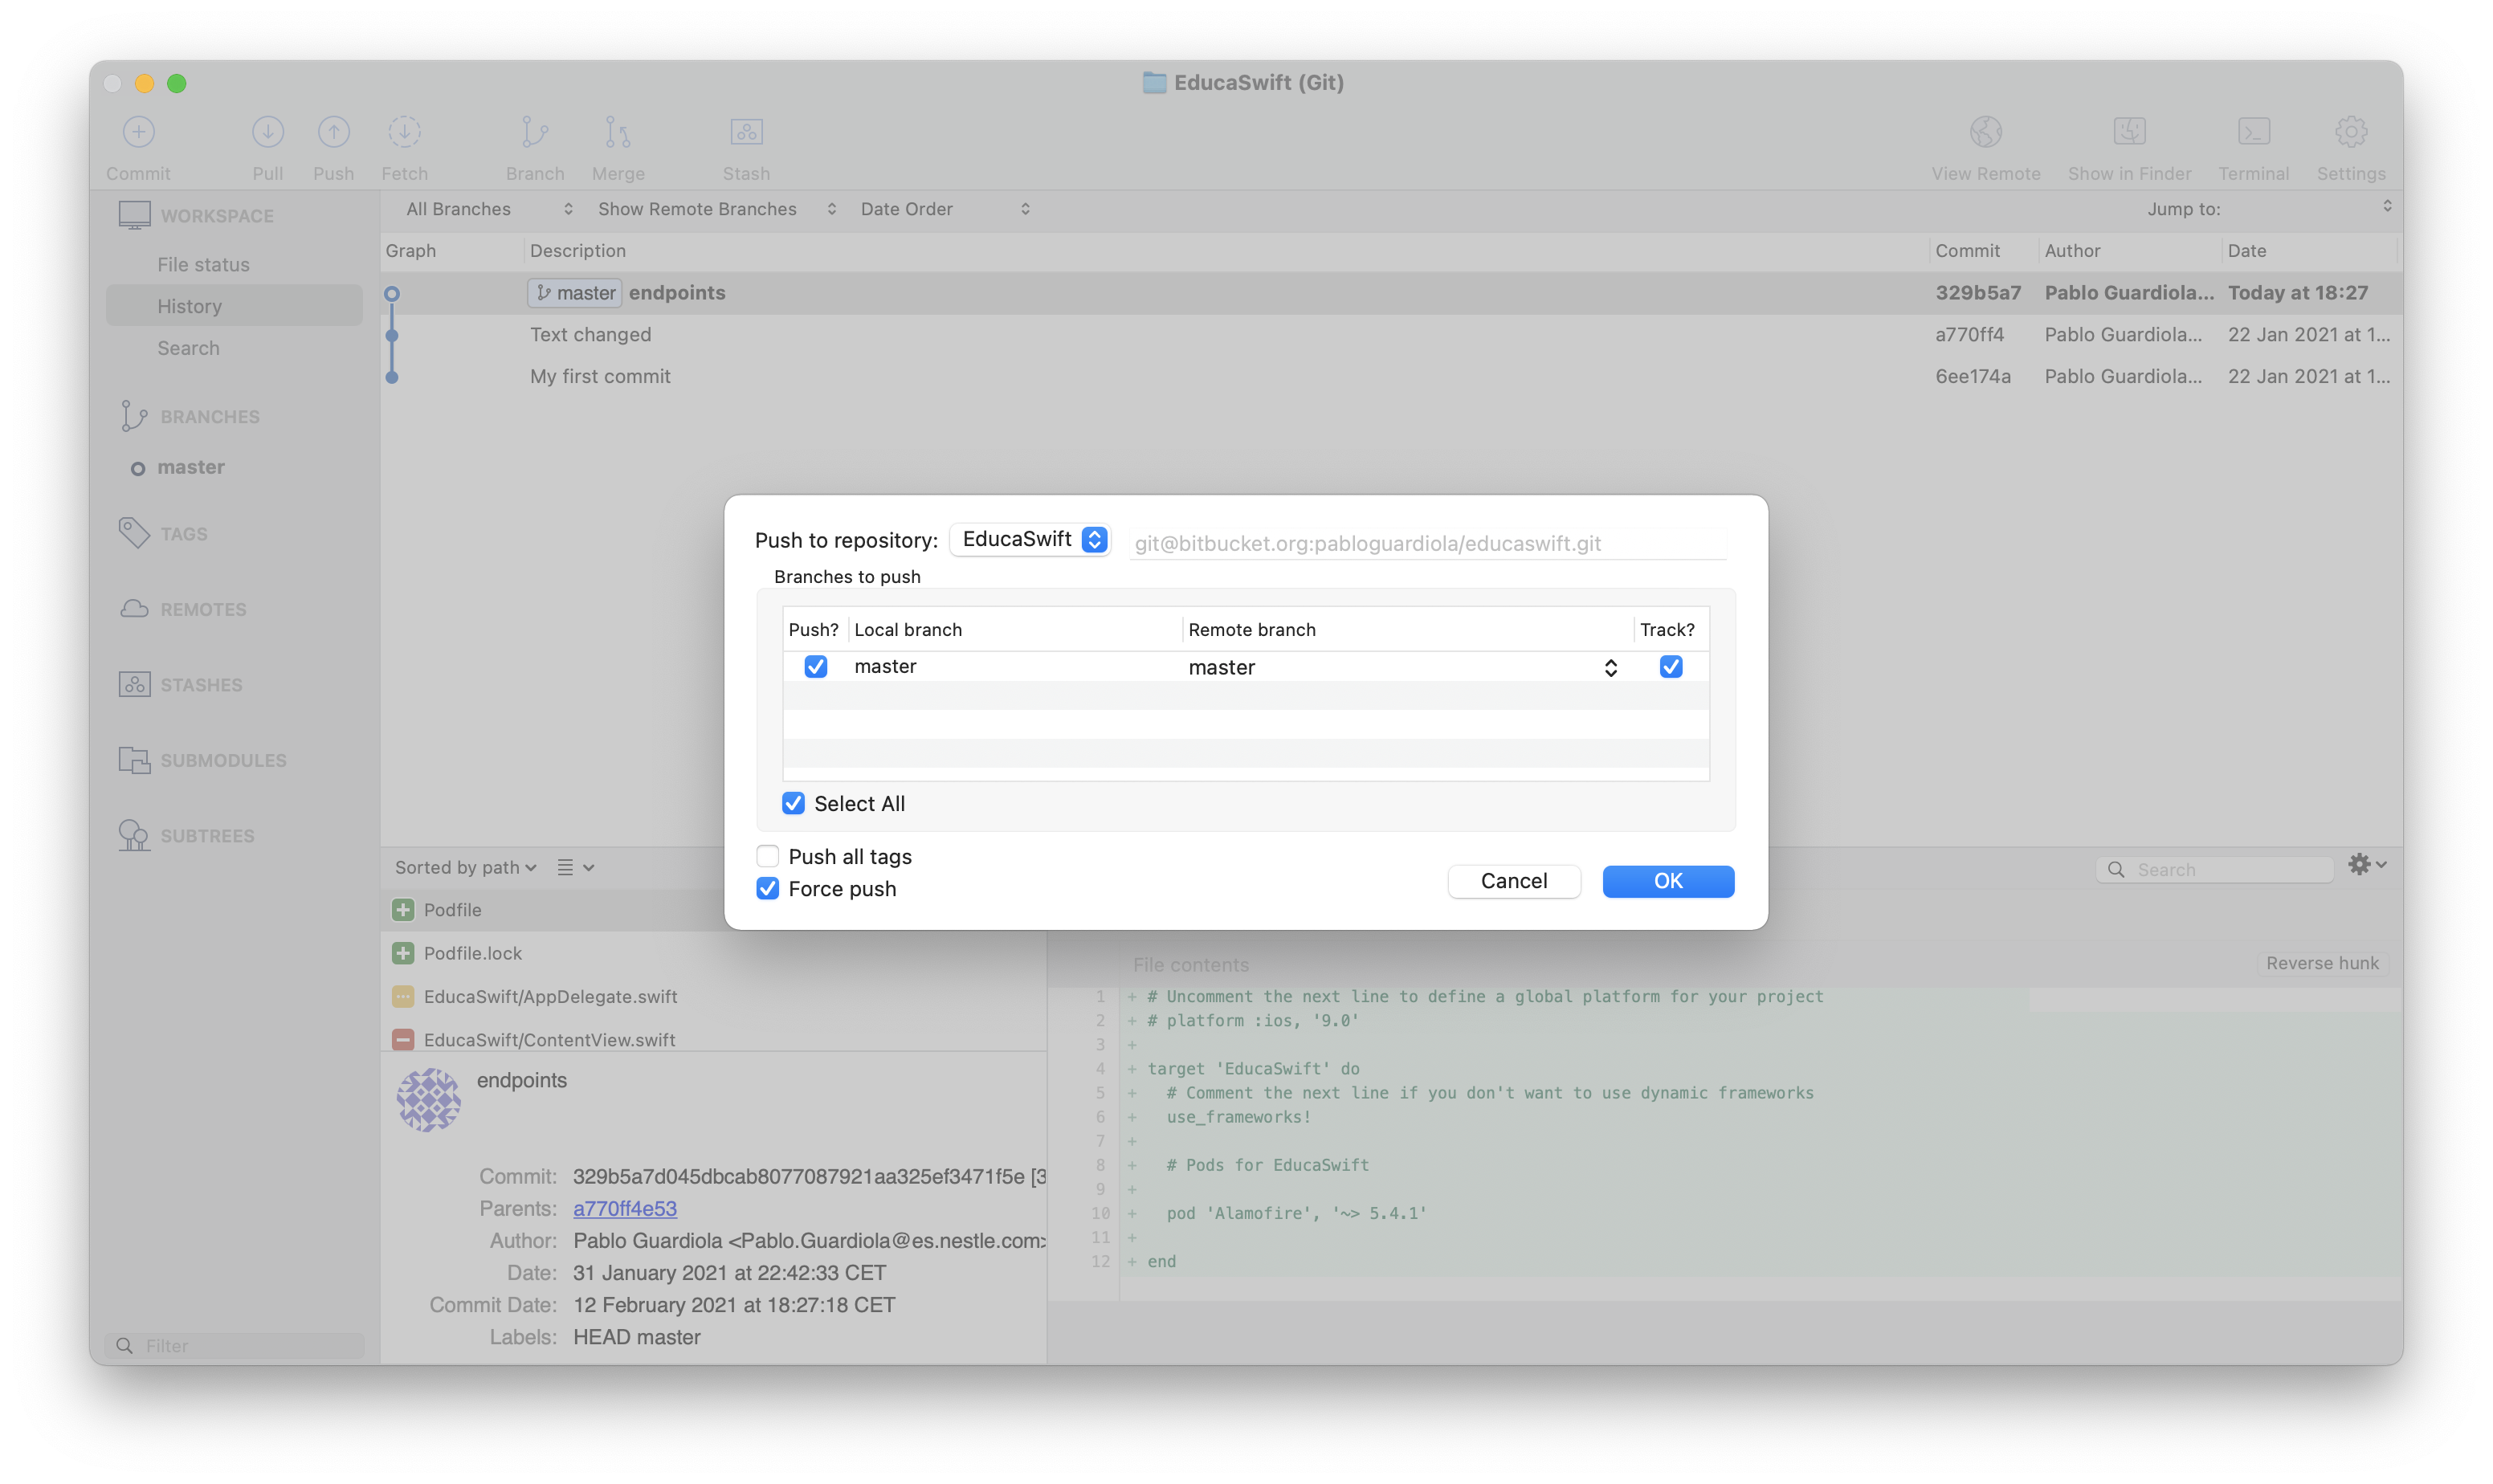
To upload our code to BitBucket, we will do a Push from master by right-clicking and selecting the option PushTo->YOUR_REPOSITORY_NAME.
Since this is the first time we are uploading our code, we will check the "Force Push" option to overwrite the files created by default in BitBucket. It is not recommended to do this in future pushes as we could lose information.
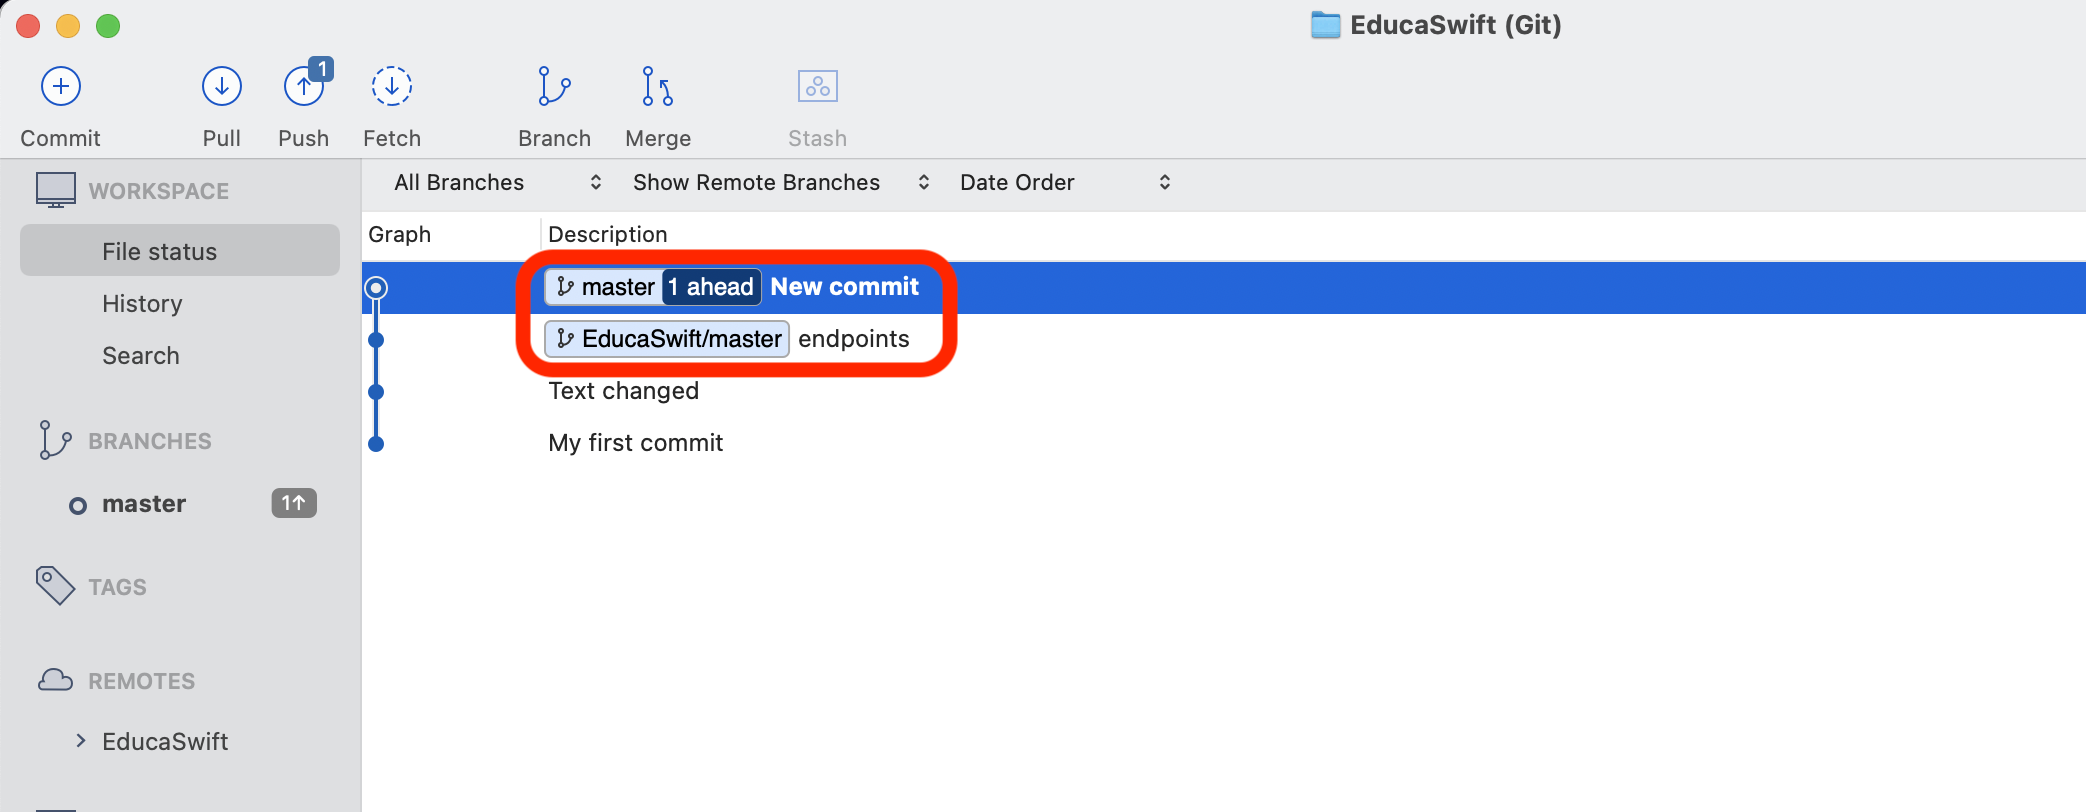
If we create a new commit, we can see that it is marked as master, and the previous commit is marked as EducaSwift/master, which means that this commit is on our computer but not on the server. To push it, we will need to do Push again.
Pull
If another team member pushes his changes, we won't have thst code on our machine until we do a Pull. This action will download all the remote commits that we are missing.

Be the first to comment