Xcode Schemes are an essential part of iOS development, providing developers with a flexible way to manage the build, run, test, and archive settings of a project. Schemes allow you to control how your app is built and executed under different configurations, making them indispensable for managing environments like development, testing, and production.
What Is an Xcode Scheme?
An Xcode Scheme defines a collection of actions, such as building, running, testing, profiling, and archiving, for a specific target in your project. Each scheme allows you to configure these actions in different environments or configurations.
Let's see an example of this just editing the current Scheme of our project, that has been created by default.
- Go to the status bar and click on the current scheme (usually displayed as your app name) next to the device selector.
- Select "Edit Scheme" from the dropdown.
You’ll see various sections on the left, each representing an action you can perform for your project. For instance, the Run section typically uses the Debug configuration, while the Archive section uses the Release configuration.
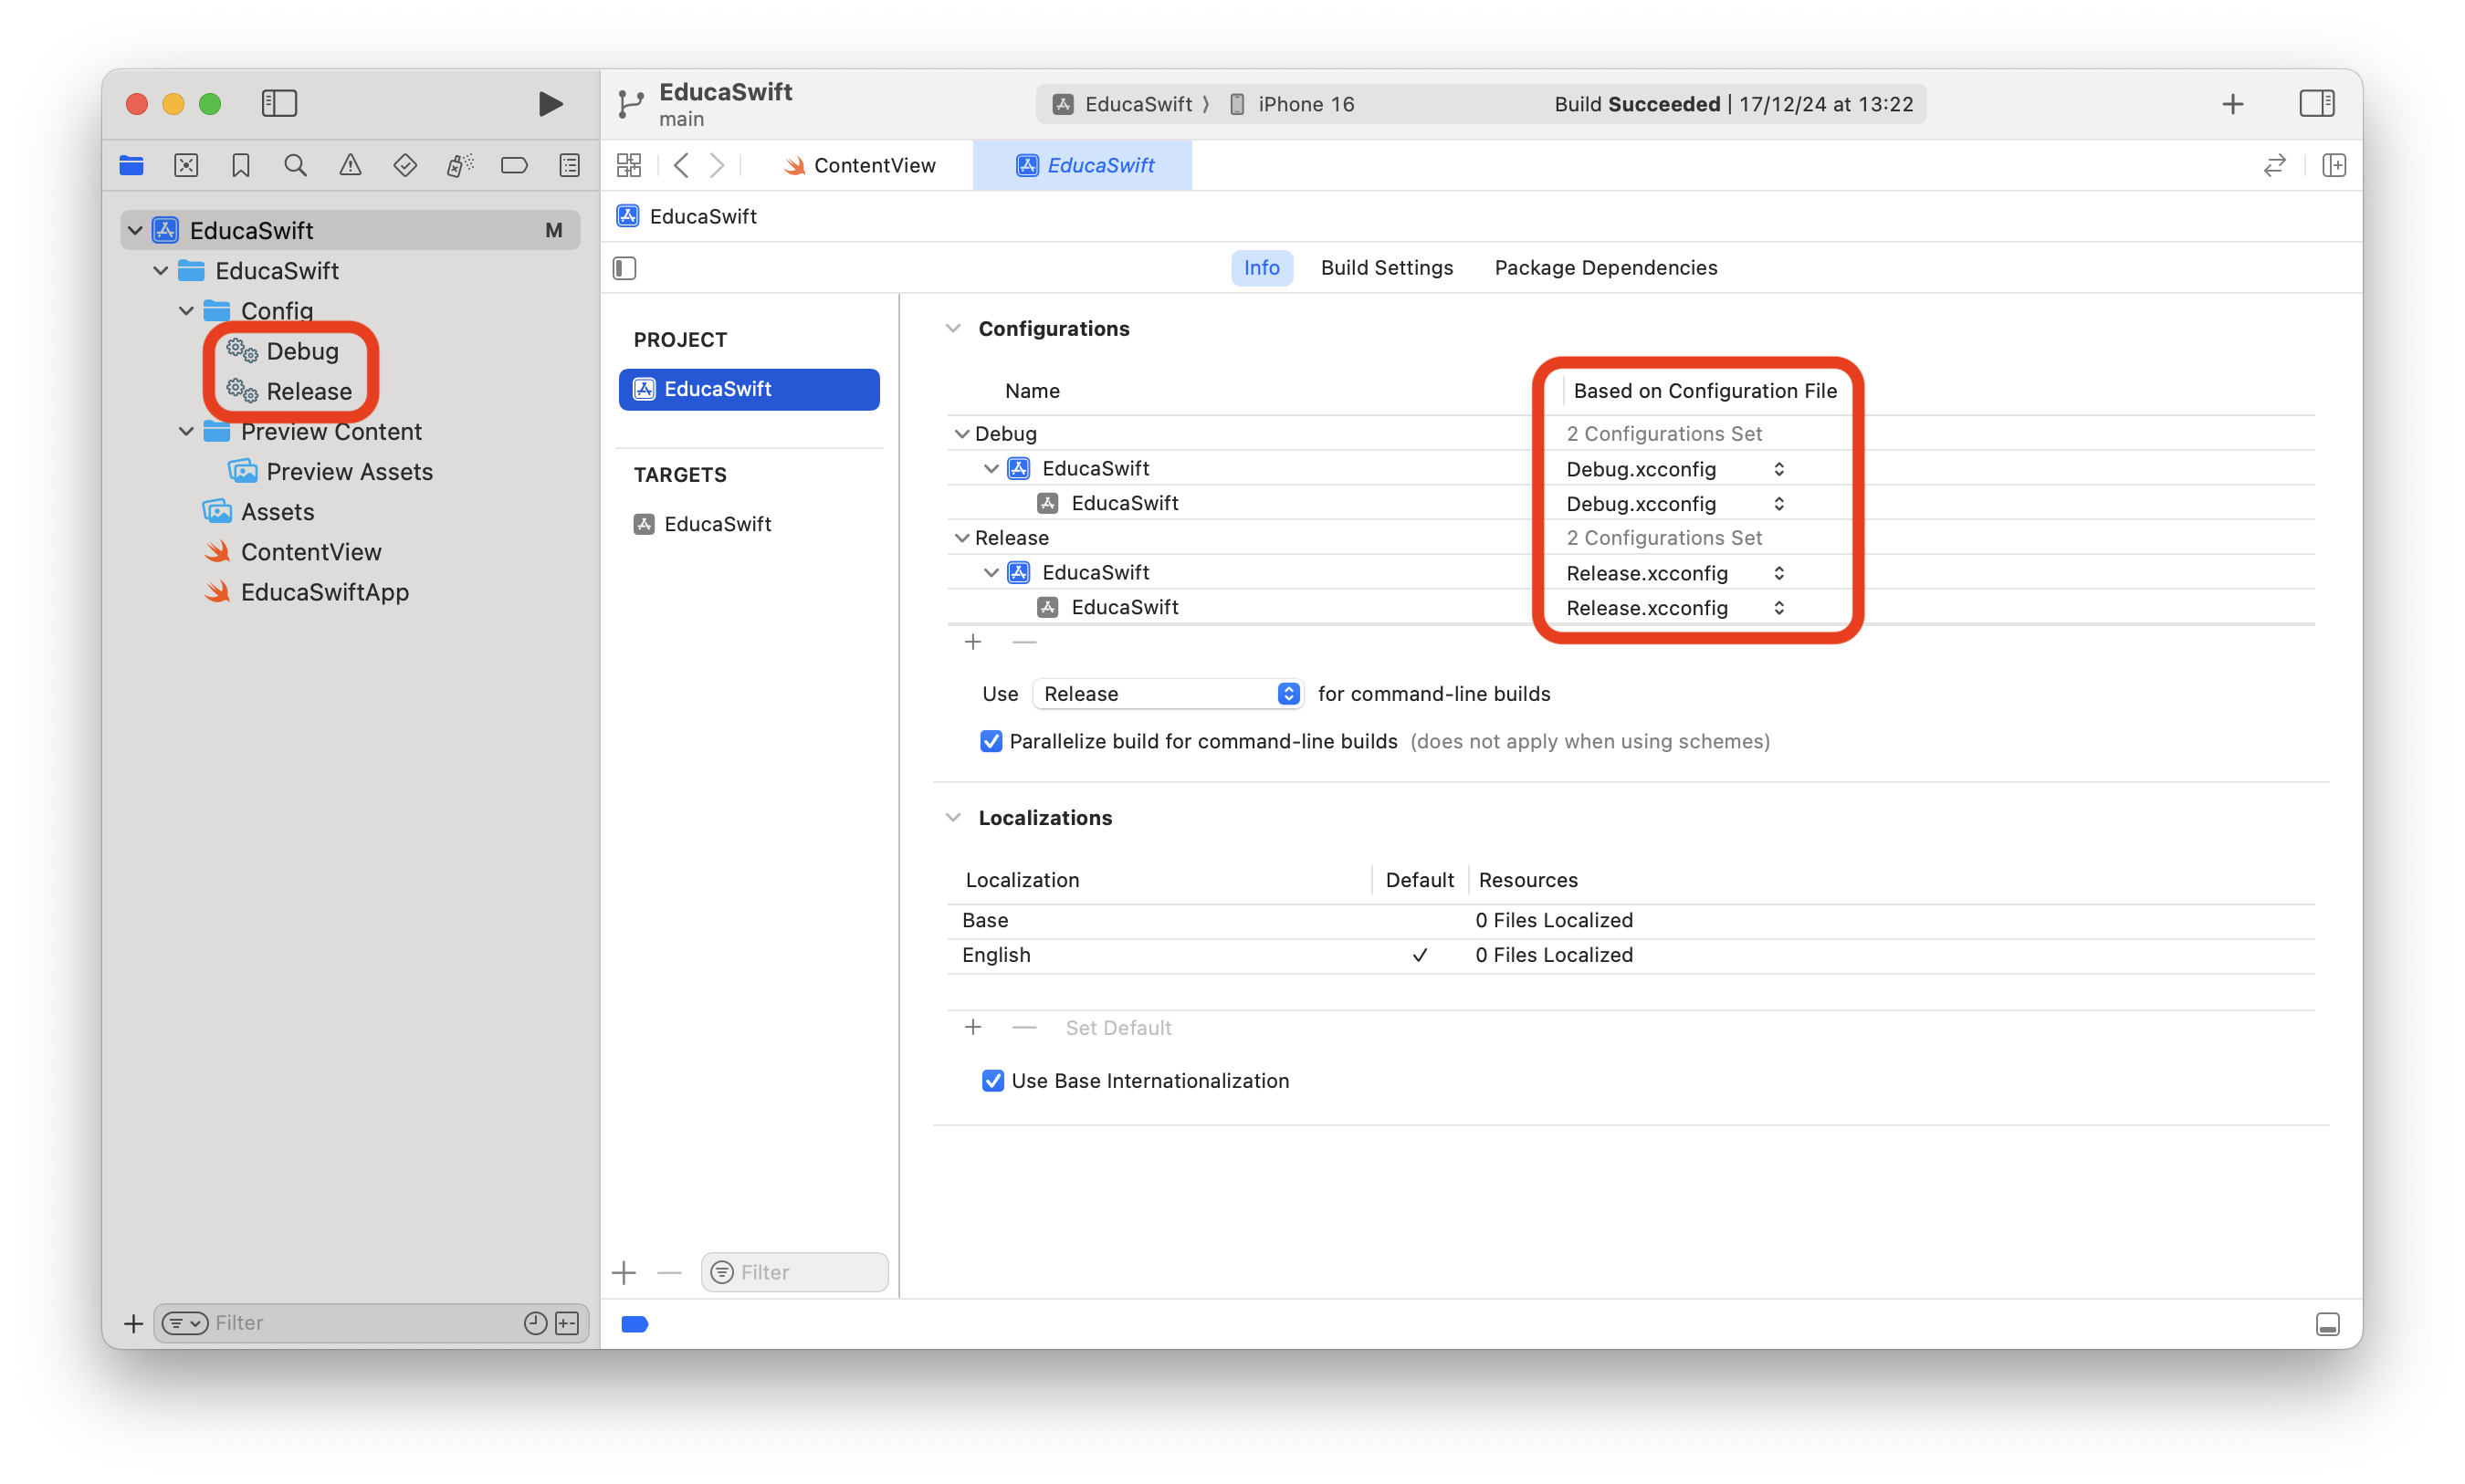
You can use different xcconfig files for each configuration (check the article about how to create xcconfig files), and then set them up at a project level:
Creating and Managing Xcode Schemes
By default, Xcode creates a scheme for each target in your project. However, you can create and configure your own custom schemes to suit your development workflow.
Steps to Create a New Scheme:
- Go to the status bar and click on the current scheme (usually displayed as your app name) next to the device selector.
- Select "New Schemes" from the dropdown.
- Give your scheme a meaningful name (e.g., Development, Staging, Production).
- Select the target for your scheme and configure its settings.
You can now configure your new scheme to suit your build and runtime requirements.
Configuring Xcode Scheme Settings
As we mention earlier, Xcode Schemes have several key sections that can be configured depending on your project’s needs:
1. Build
This section allows you to specify which targets and dependencies should be built when the App is built.
2. Run
Under this section, you control how the app will run (for example in the simulator). You can specify arguments and environment variables to be passed during execution. This is useful for setting up different configurations for environments like development or production.
3. Test
The test section enables you to define which test targets should be executed when testing under this scheme. You can also set the configuration to be used when testing.
4. Profile
In the profile section, you configure how to profile the app using Instruments. This allows you to analyze app performance and memory usage under this scheme.
5. Archive
The archive section lets you configure how the app is archived for distribution. You typically select the Release configuration for a production-ready archive.
Debug and Release Configurations
Most Xcode schemes come with two default configurations: Debug and Release. These configurations affect how your app is built and optimized.
- Debug Configuration: Used during development. It enables debugging symbols and disables optimizations, making it easier to debug your code.
- Release Configuration: Used when releasing your app. It disables debugging symbols and enables optimizations, resulting in faster performance.
Common Use Cases for Custom Schemes
Custom schemes allow you to tailor your development workflow. Here are some common scenarios where custom schemes are useful:
1. Separate Environments (Development, Staging, Production)
You can create schemes like Development, Staging, and Production to run your app in different environments. Each scheme can have different configurations, APIs, or environment variables.
2. Testing Schemes
For projects with multiple test targets, you can create separate schemes for unit testing, UI testing, or integration testing. This allows you to quickly switch between different testing configurations without manually selecting test targets each time.
3. Debugging and Profiling
You can set up a scheme specifically for performance profiling with Instruments, allowing you to run the app with specific parameters optimized for debugging or profiling.
Run Options
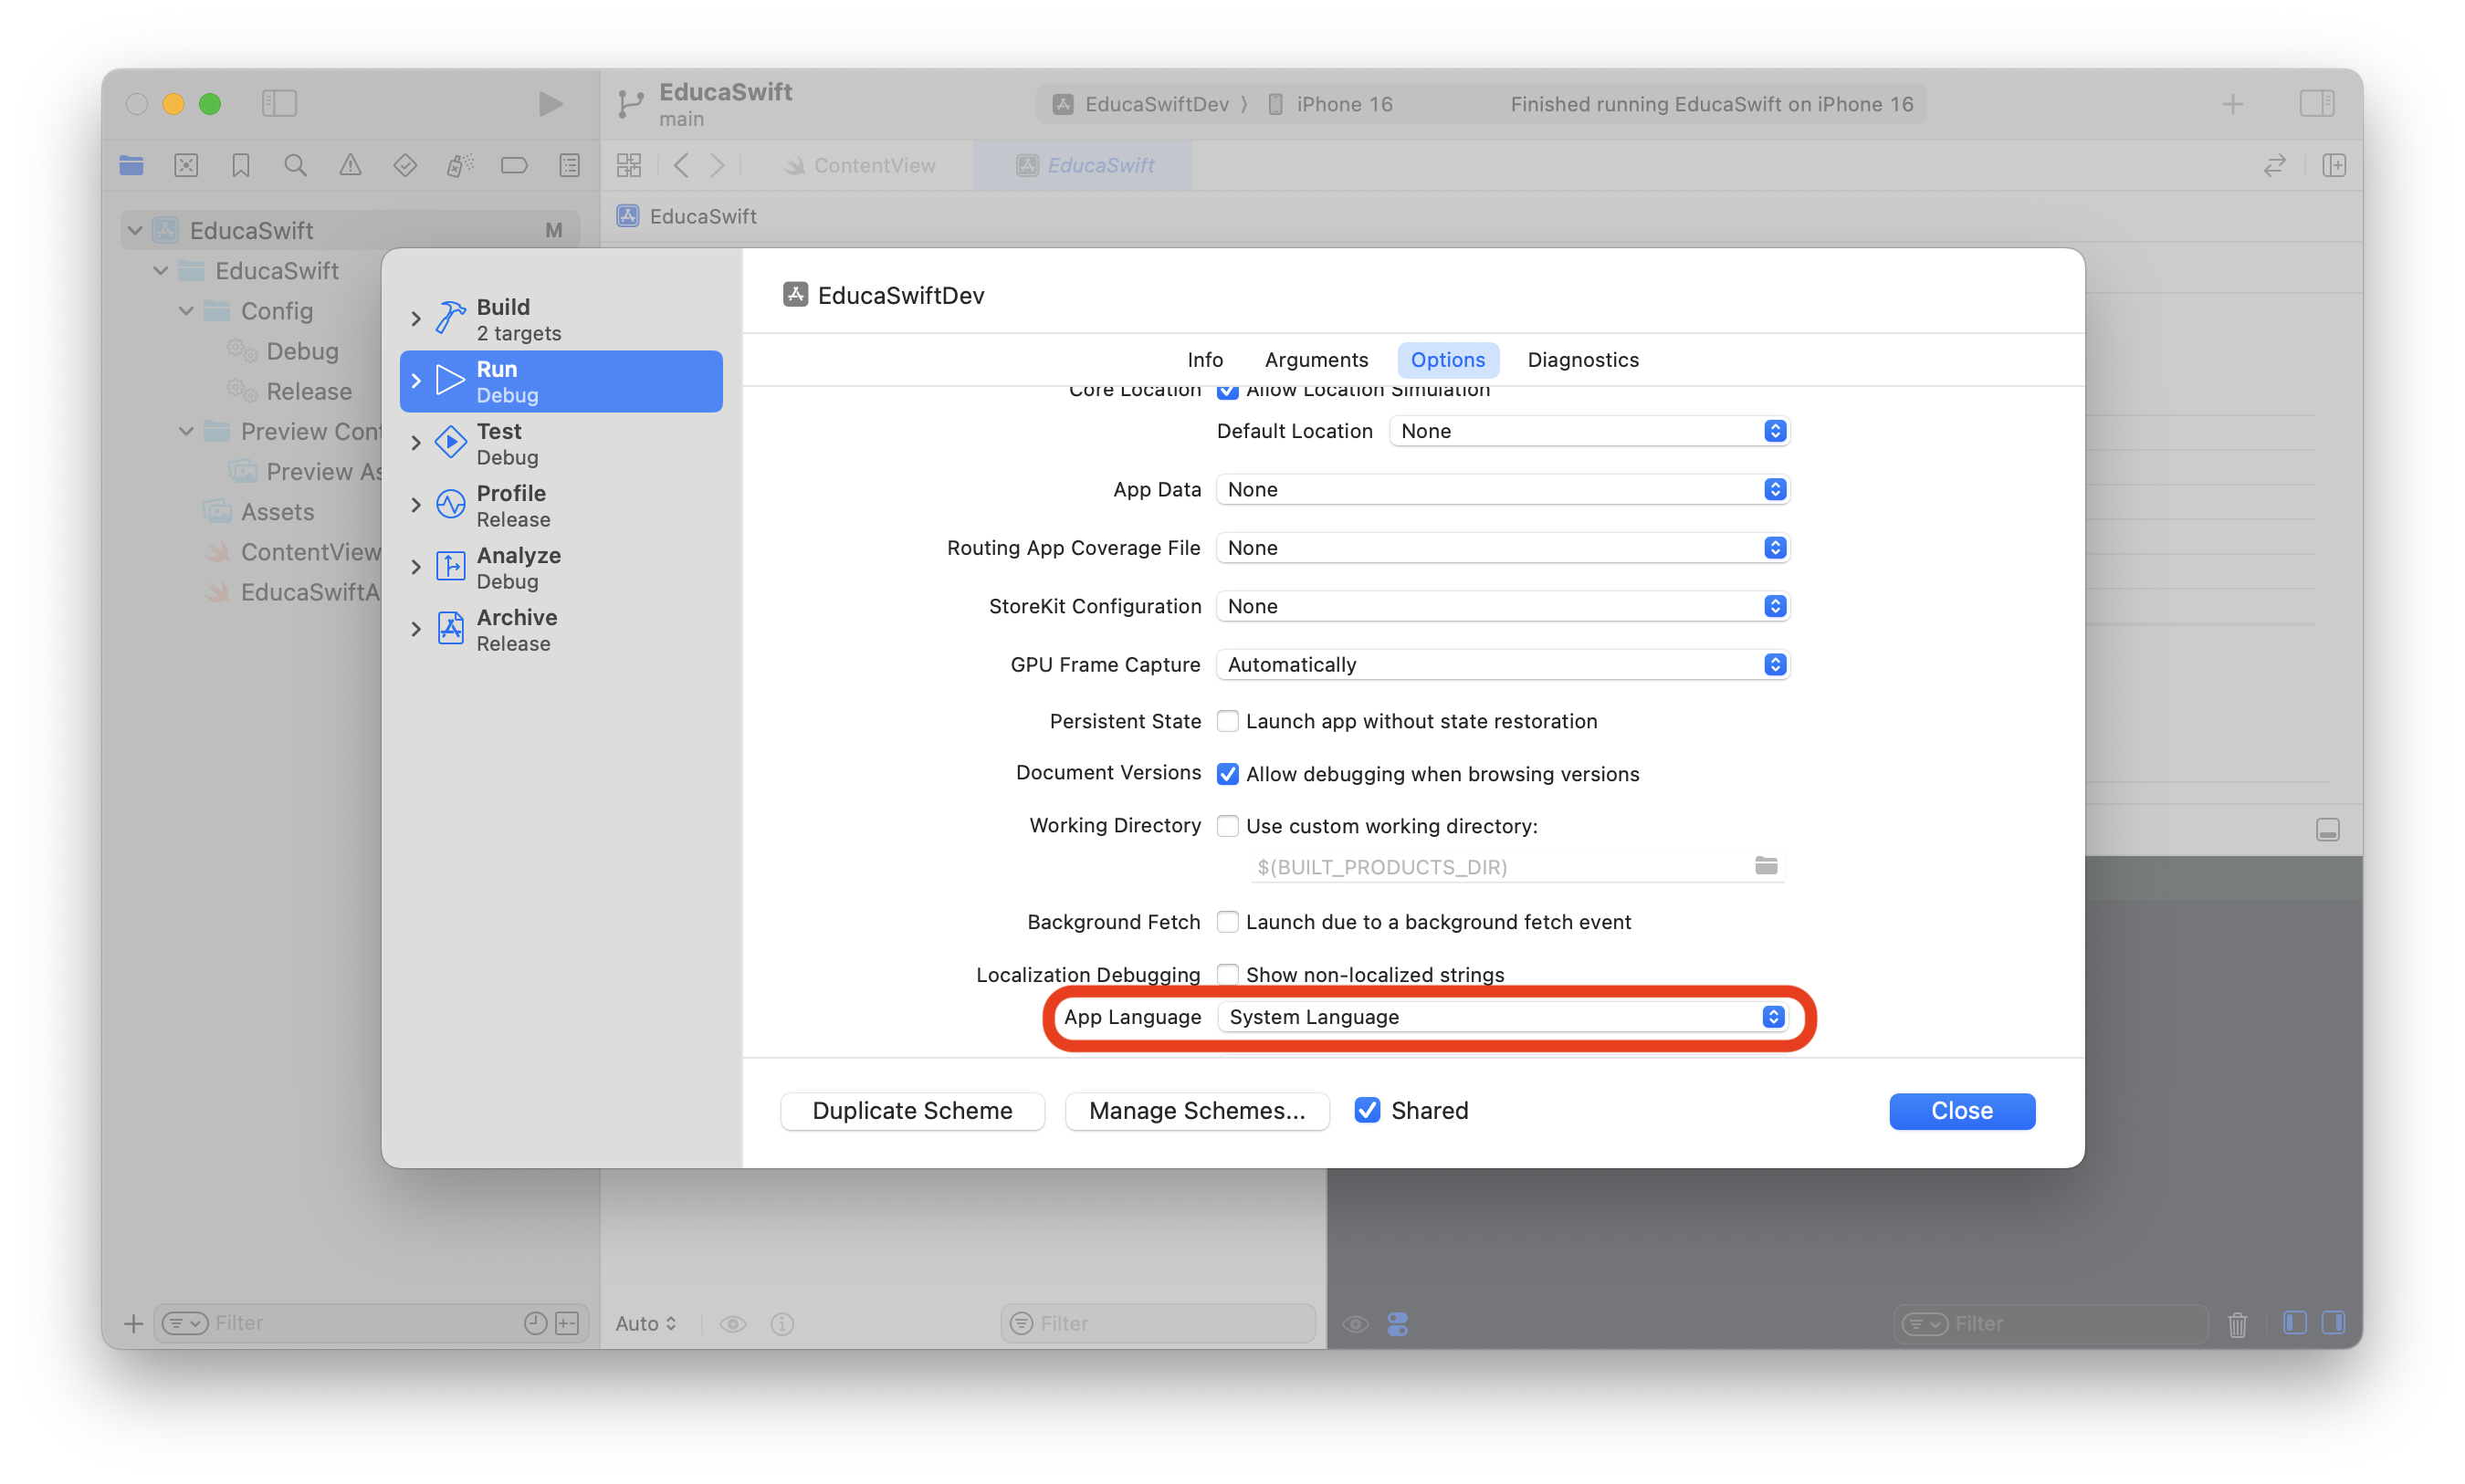
Now we are here, let's check some interesting options that you can set for debugging (Run action). You can find this in Options tab.
This tab allows you to easily test different configurations in your simulator (or real device), such as the app's language. When you select a language here, the app will run as if the device's system language is set to that choice. However, this configuration only applies when you tap the Run button. Once you quit the app, the setting will no longer be applied.


Be the first to comment