Core Data is an Apple's framework dedicated to database management. We can store large amounts of data not only on the device but also in iCloud, as we will see in later articles.
Let's see how to setup and use Core Data in our project.
Setup Core Data
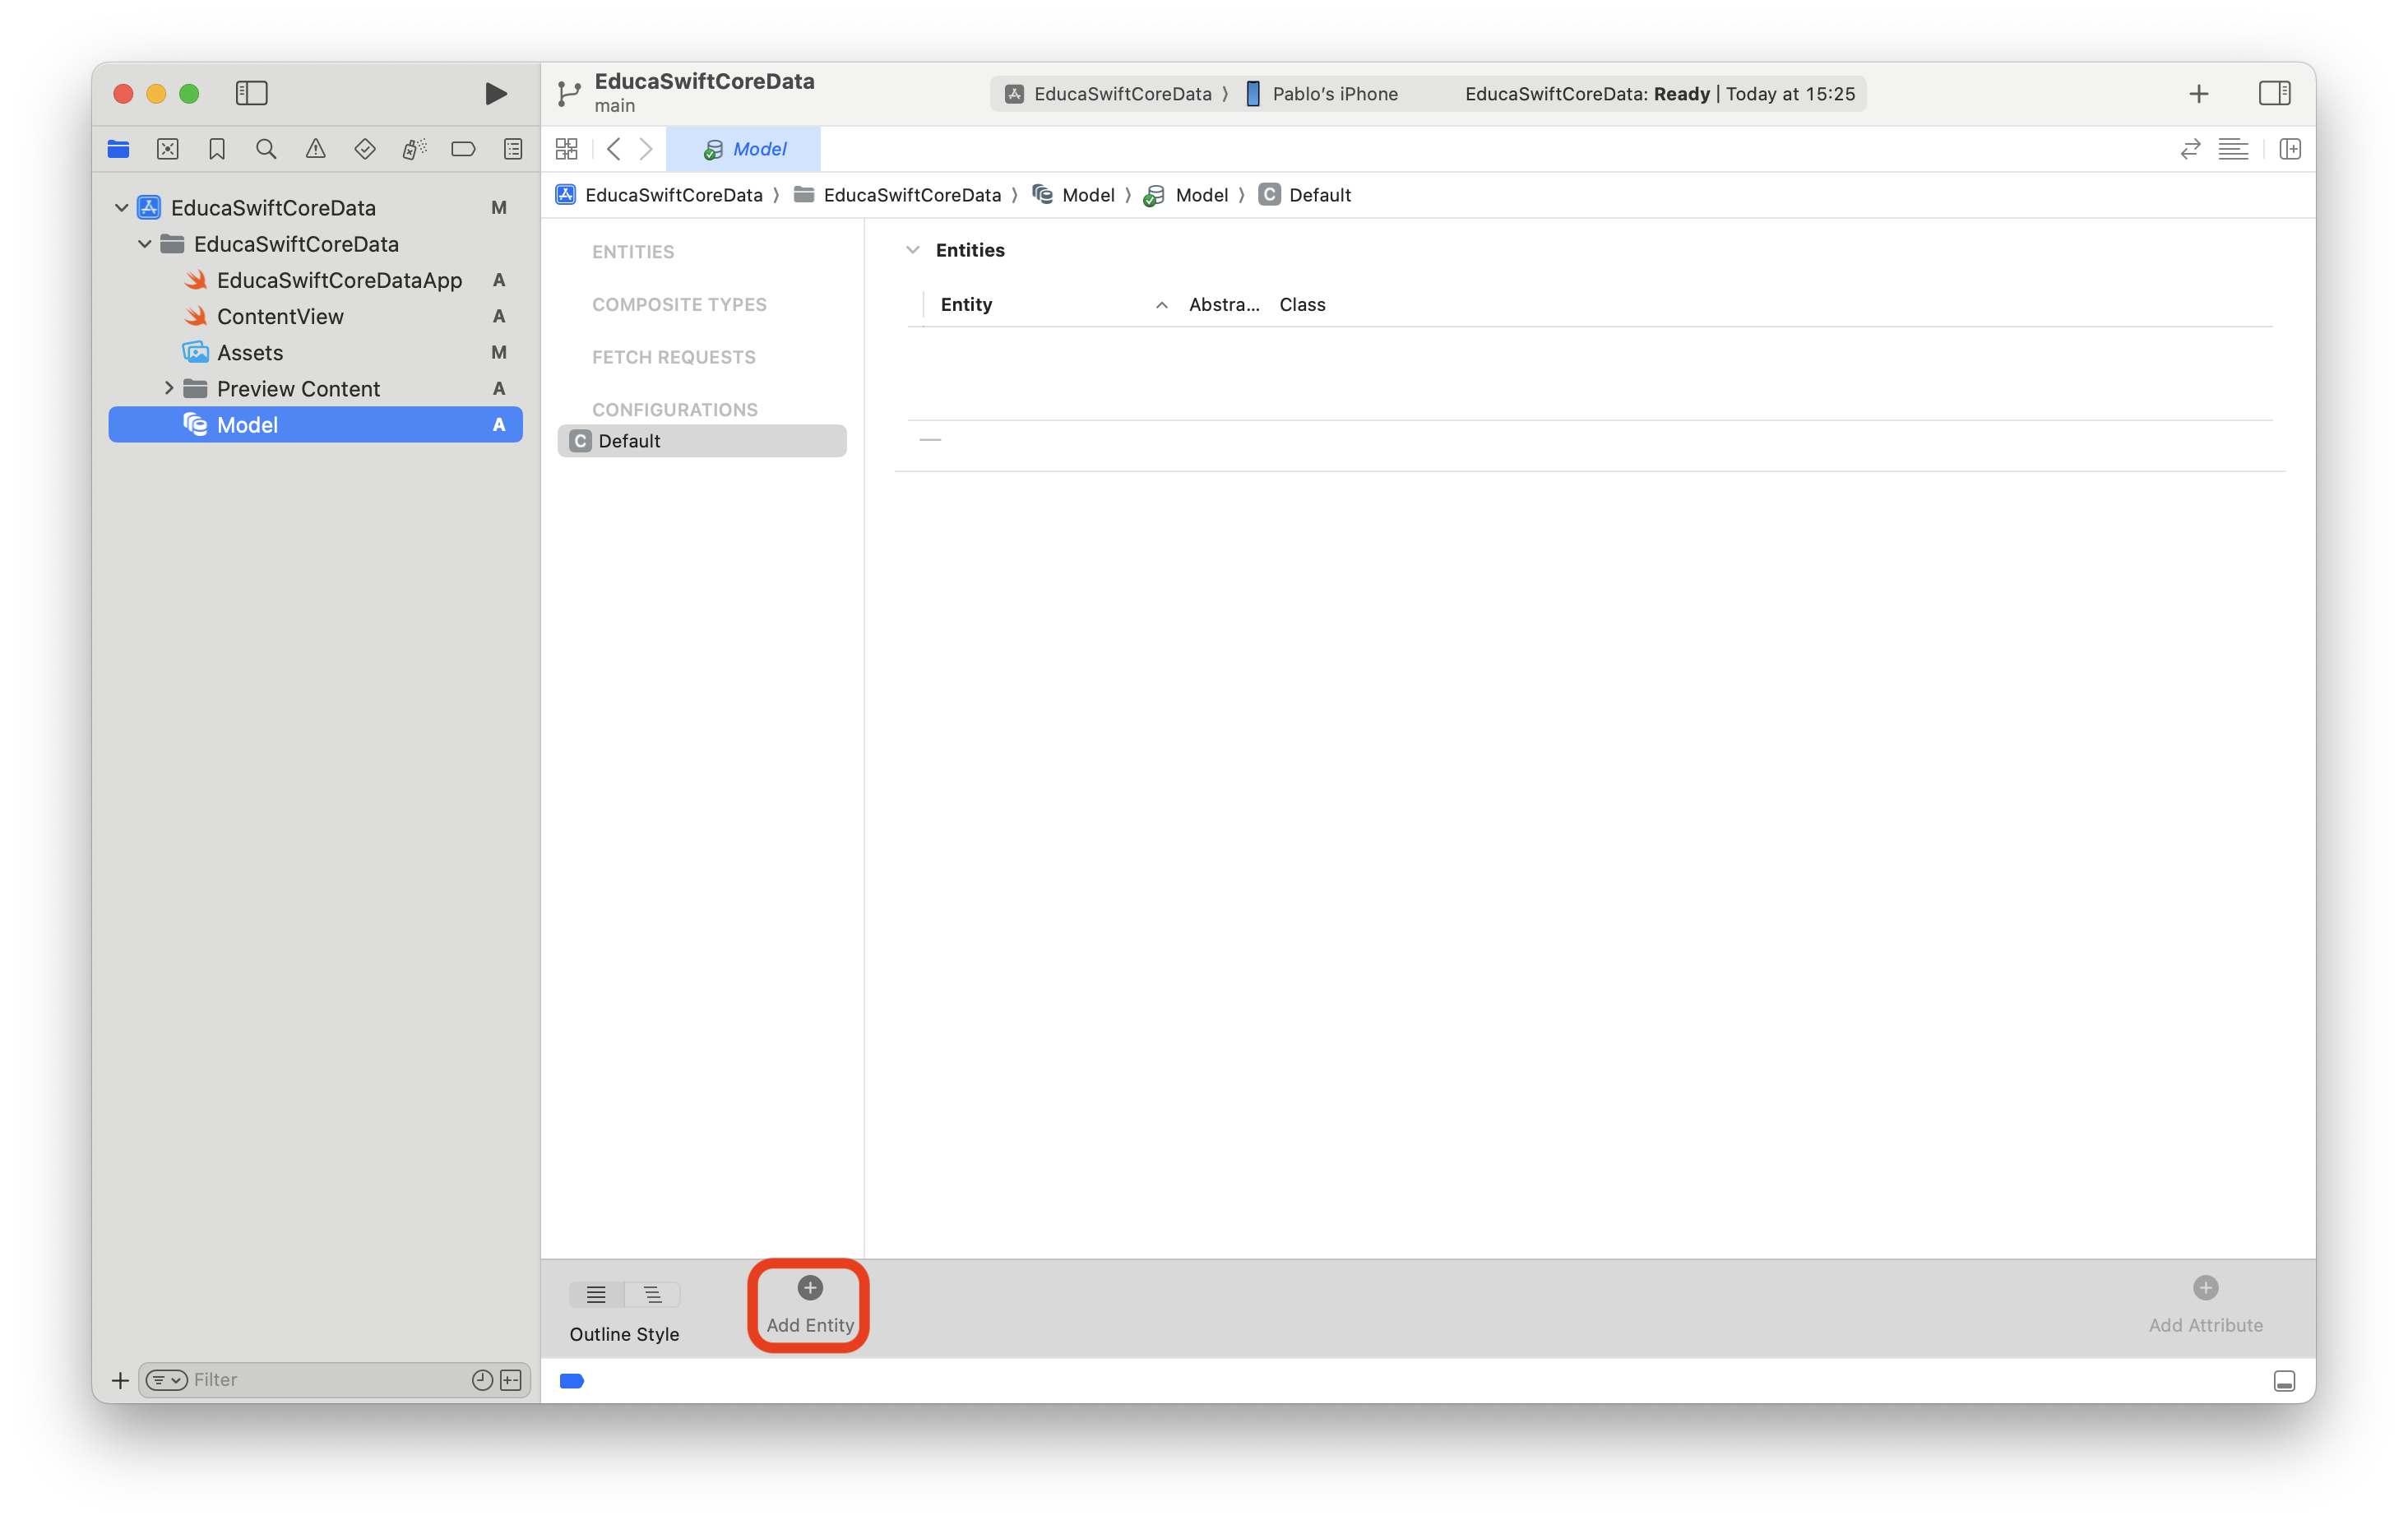
The first step in working with Core Data is to create a Data model file to define the structure of your app’s objects, including their object types, properties, and relationships. To do this, create a Data Model file in the root of your project:
In order to manage this data model we'll create a class named CoreData that will load our data model container.
import CoreData
import SwiftUI

@Observable
class CoreData {
    let container = NSPersistentContainer(name: "Model")

    init() {
        container.loadPersistentStores { description, error in
            if let error = error {
                print("Core Data failed to load: \(error.localizedDescription)")
            }
        }
    }

}
This container will be used for saving and retrieving our data, so we need to make this available from the App's main file, so we can access to it from our Views.
@State private var coreData = CoreData()

var body: some Scene {
    WindowGroup {
        ContentView()
            .environment(\.managedObjectContext, coreData.container.viewContext)
    }
}
Create our models
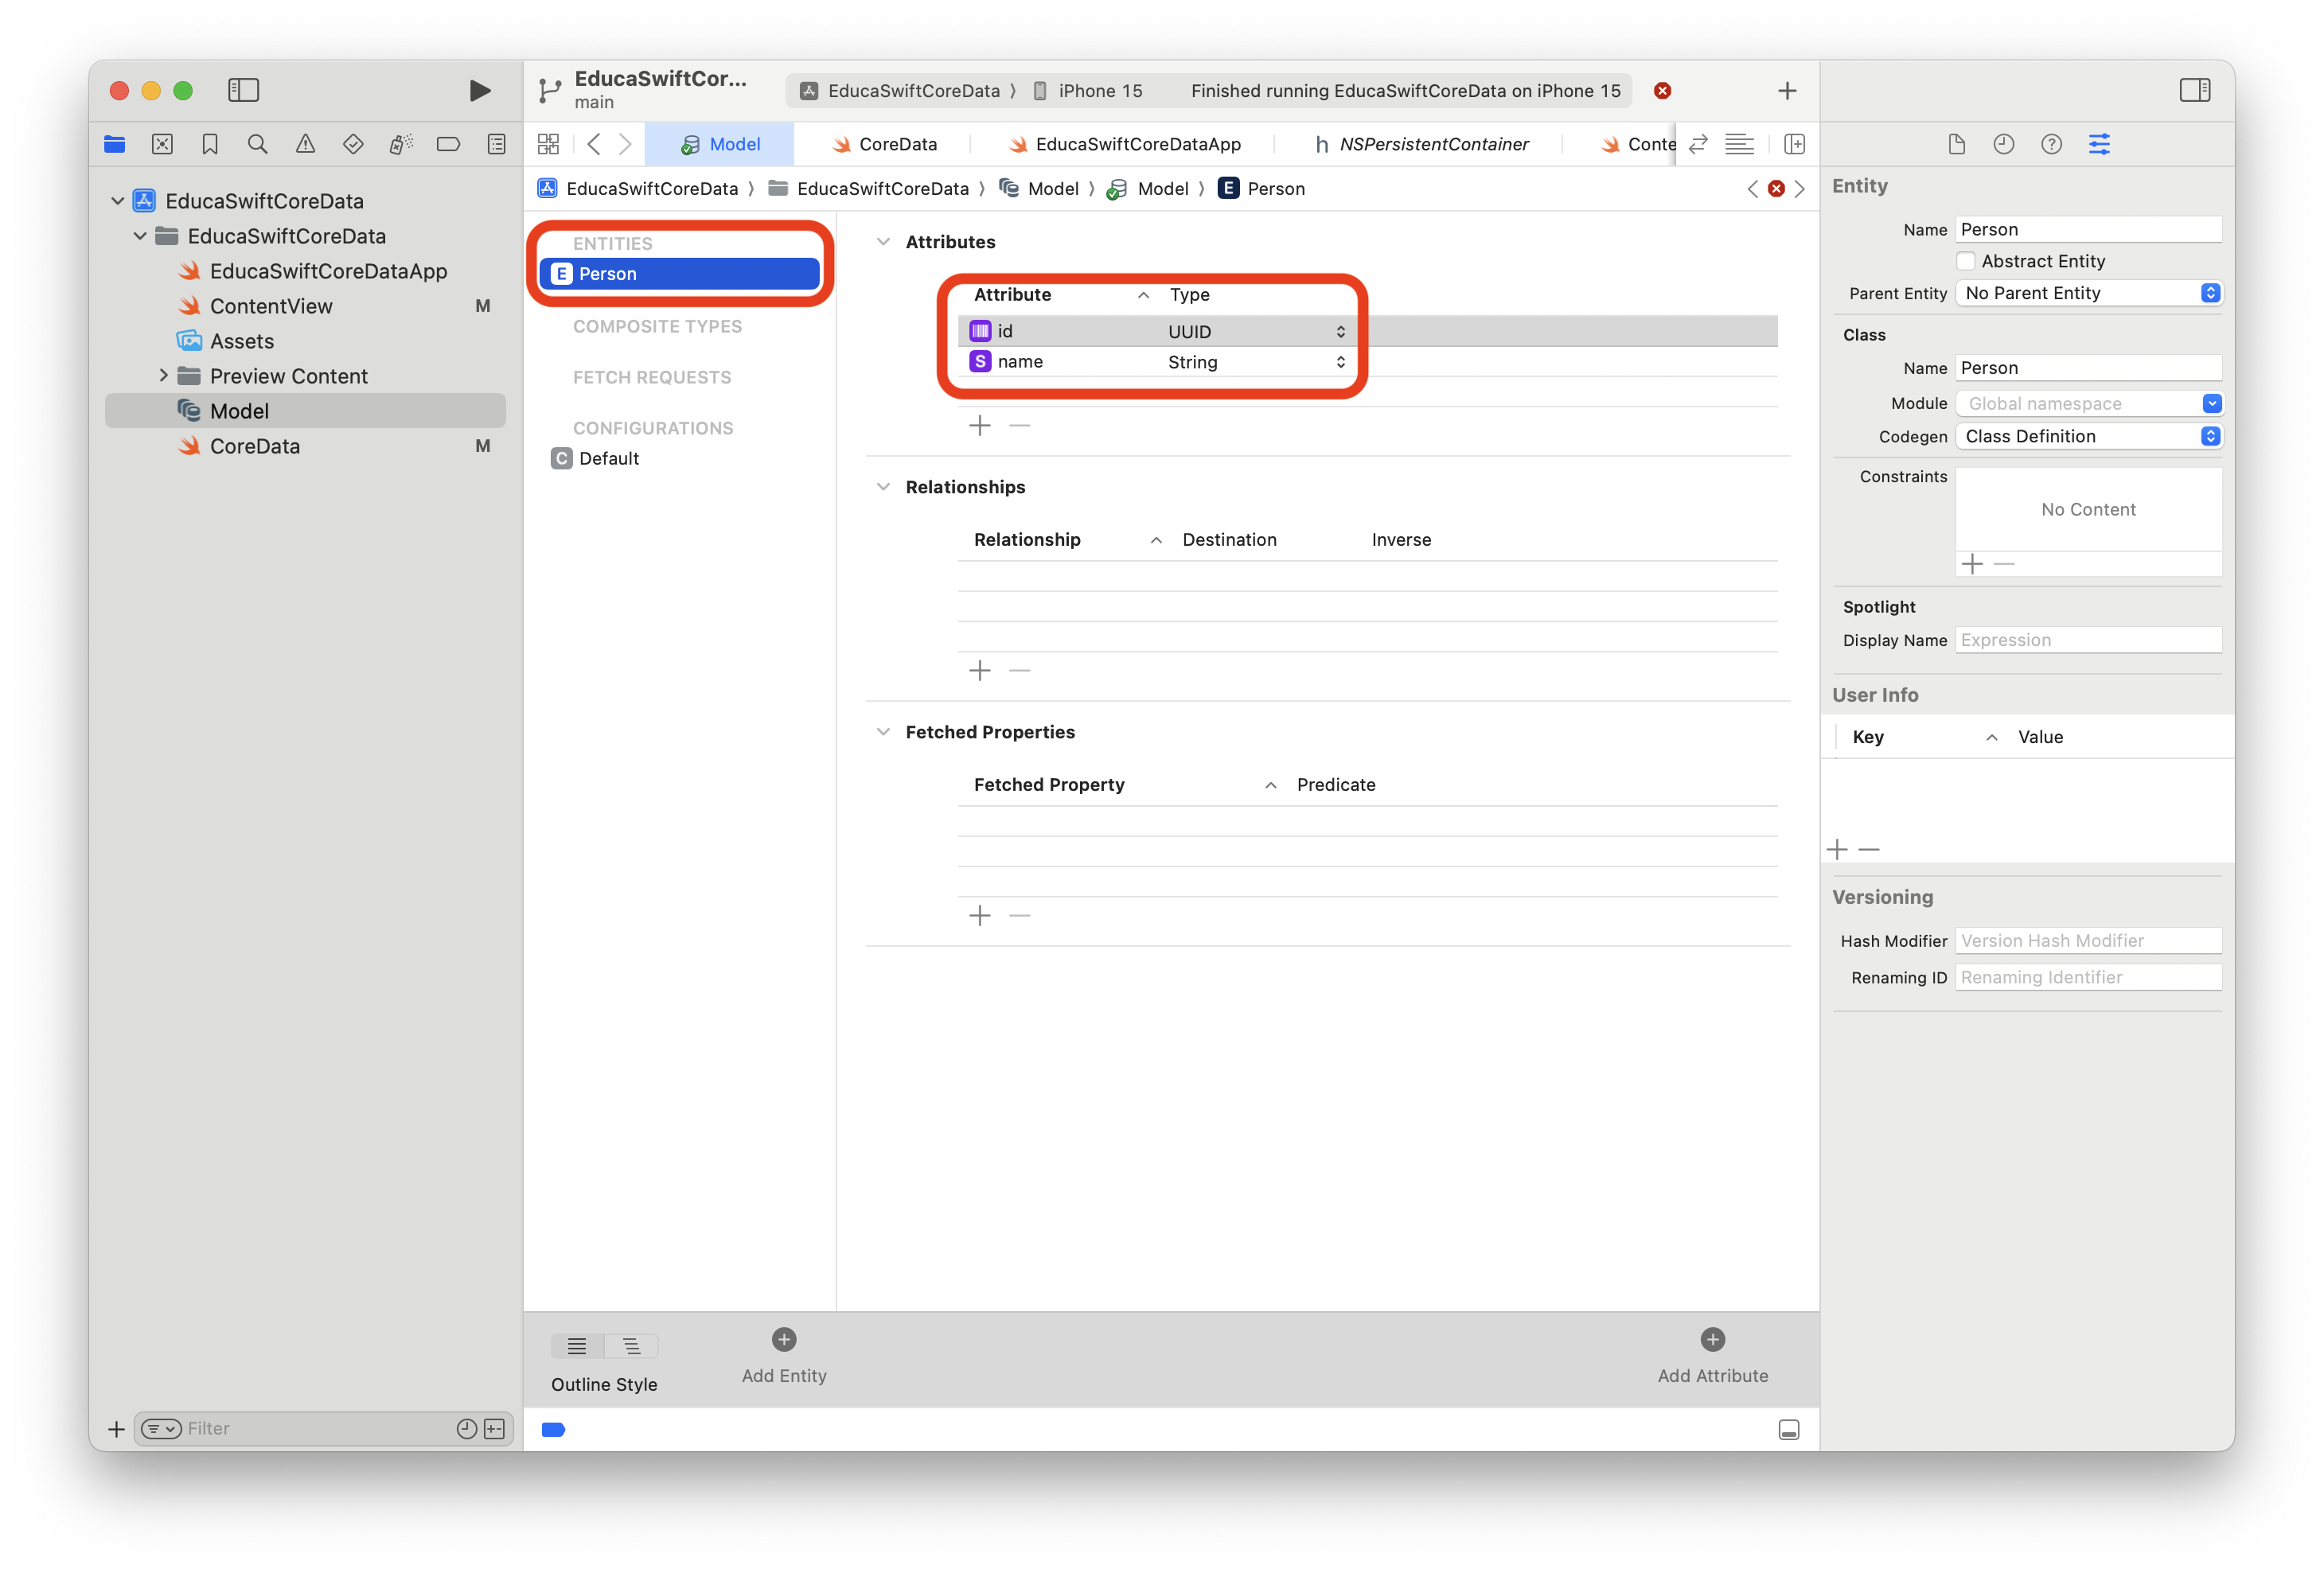
The next step will be declaring the objects on our data model, but in this case we don't need to create classes or struct but just add them as Entity in the data model file we created before:
Once you created the Entity called Person, you will be able to add the attributes (properties).
That's it, Xcode will generate the objects so even if you won't see those files, Person object will be accessible.
Fetch data
In this article's example, we are going to show a list of Person, so when we declare our Person array, we'll do it as a @FetchRequest, instead of as a @State:
@FetchRequest(sortDescriptors: []) var persons: FetchedResults<Person>
We'll check later what sortDescriptors are.
Insert data
We'll need our Data Model's container to add, update or delete data, so we need to inject this as an Environment variable.
@Environment(\.managedObjectContext) var moc
Then, we can insert new data just creating an instance of Person, updating its properties and calling moc's save() function.
var person = Person(context: moc)
person.id = UUID()
person.name = name

try? moc.save()
save() functions throws an error in case the data couldn't be saved successfully.
Let's put all this together in an example where we show a list of Person above a TextField with an add Button that allows the user to add a Person just introducing the name. Once the Person is added to the list, the TextField is cleared.
import CoreData
import SwiftUI

struct ContentView: View {
    @Environment(\.managedObjectContext) var moc
    @FetchRequest(sortDescriptors: []) var persons: FetchedResults

    @State var inputText: String = ""

    var body: some View {
        VStack {
            List(persons) { person in
                Text(person.name ?? "No name")
            }

            inputBar
        }
    }

    var inputBar: some View {
        HStack {
            TextField("", text: $inputText)
                .textFieldStyle(.roundedBorder)

            Button {
                addPerson(name: inputText)
                inputText = ""
            } label: {
                Text("ADD")
            }
        }
        .padding()
    }

    func addPerson(name: String) {
        var person = Person(context: moc)
        person.id = UUID()
        person.name = name

        try? moc.save()
    }
}

#Preview {
    ContentView()
}
Result
You can find all this code together in our samples repository, here.


Be the first to comment