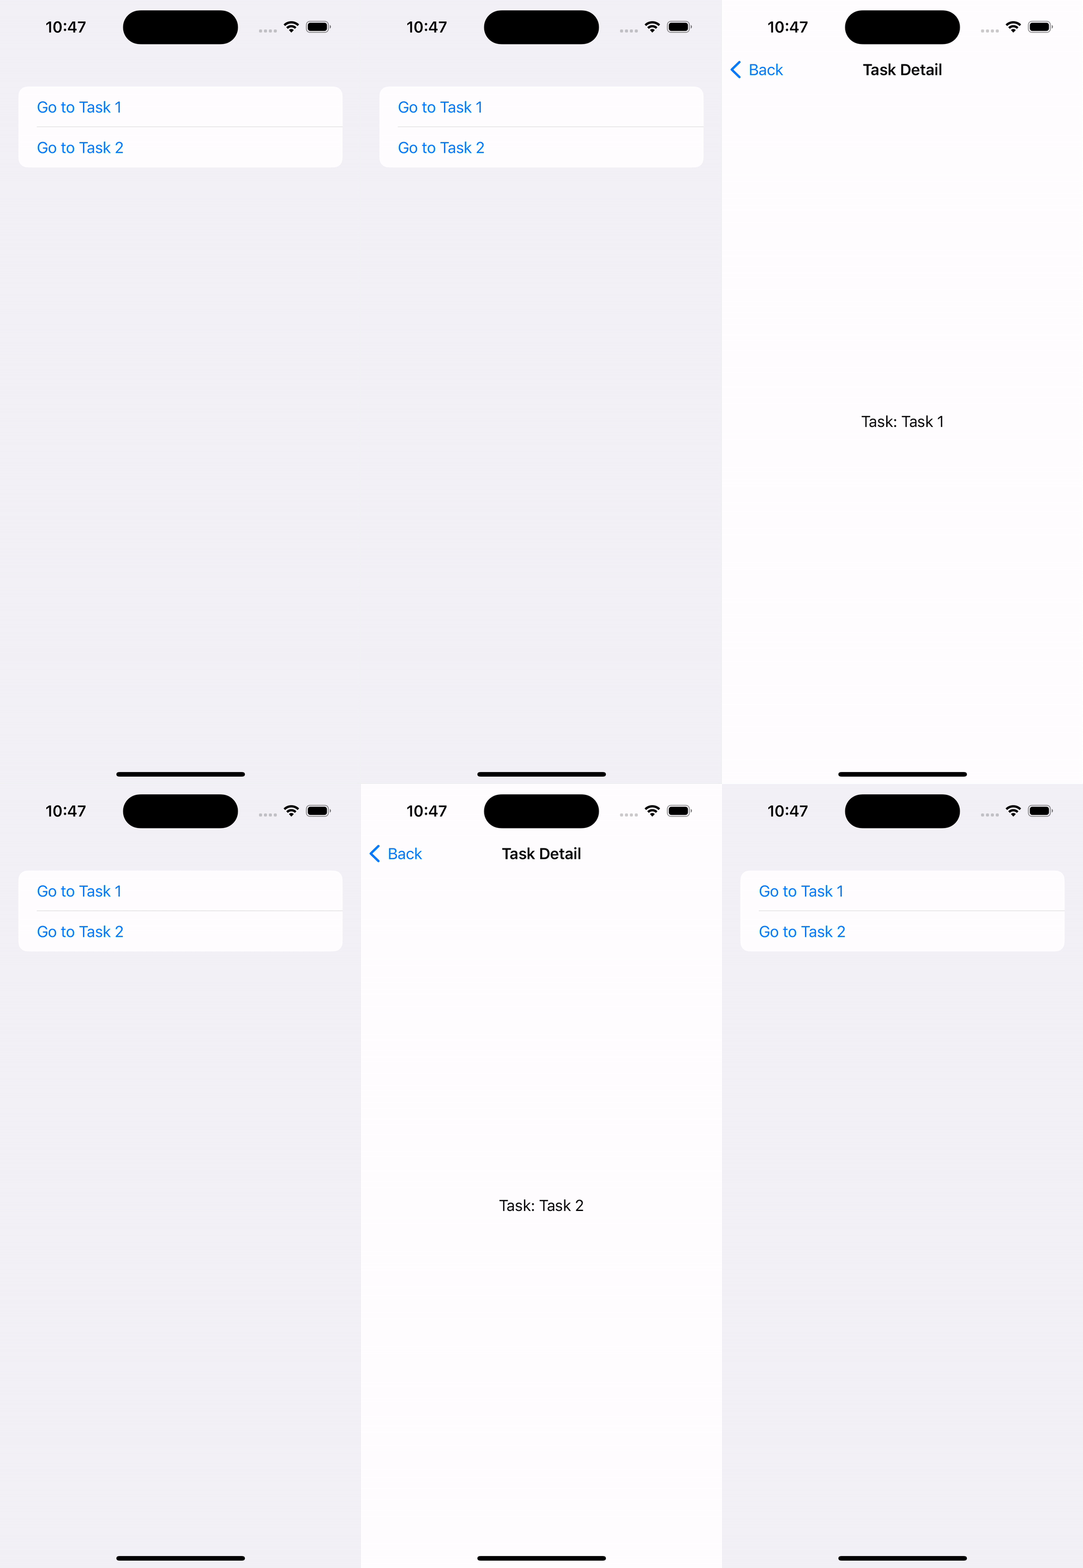
The introduction of NavigationPath provides developers with a more flexible and powerful way to manage navigation within a SwiftUI app, especially for deep, programmatic navigation.
In previous articles, NavigationLink has been used to push views onto a navigation stack, but the addition of NavigationPath in iOS 16 allows for greater control over the navigation stack and provides dynamic paths for navigating between different screens.
What is NavigationPath?
NavigationPath is a data structure that defines a dynamic navigation stack, allowing developers to push and pop views programmatically. It’s particularly useful in situations where the navigation flow depends on data or state, such as navigating to specific detail views based on user interaction.
With NavigationPath, you can control the stack by pushing or popping any number of views. This can be useful for deep navigation scenarios, and for making your app's navigation structure more dynamic and flexible.
Basic Setup with NavigationPath
Here is an example of how to use NavigationPath to programmatically manage navigation:
import SwiftUI

struct ContentView: View {
    @State private var path = NavigationPath()

    var body: some View {
        NavigationStack(path: $path) {
            VStack {
                Button("Go to Detail View") {
                    path.append("Detail")
                }
                .navigationDestination(for: String.self) { value in
                    if value == "Detail" {
                        DetailView()
                    }
                }
            }
        }
    }
}

struct DetailView: View {
    var body: some View {
        Text("This is the Detail View")
            .navigationTitle("Detail")
    }
}

#Preview {
    ContentView()
}
In this example:
- NavigationStack: Wraps the content and uses
pathto manage the navigation state. - path: A state variable of type
NavigationPath, used to control the stack. - Button: Programmatically appends a new view (in this case, a
DetailView) to the navigation stack by adding "Detail" to the path. - navigationDestination: Determines which view to present based on the value in the path. If "Detail" is in the path, it shows the
DetailView.
Pushing and Popping Views
With NavigationPath, you can easily push and pop views on the stack. Here's how to use it for more complex navigation scenarios:
import SwiftUI

struct ContentView: View {
    @State private var path = NavigationPath()

    var body: some View {
        NavigationStack(path: $path) {
            VStack {
                Button("Go to Detail View") {
                    path.append("Detail")
                }
                .navigationDestination(for: String.self) { value in
                    if value == "Detail" {
                        DetailView {
                            path.removeLast()
                        }
                    }
                }
            }
        }
    }
}

struct DetailView: View {

    let saveAction: () -> Void

    var body: some View {
        Text("This is the Detail View")
            .navigationTitle("Detail")
        Button("Save & Go Back") {
            saveAction()
        }
    }
}

#Preview {
    ContentView()
}
In this code:
removeLast(): Pops the most recent view from the navigation stack.removeAll(): Resets the entire stack, taking the user back to the root view.
Handling Complex Data with NavigationPath
Another advantage of NavigationPath is that it can store various data types, allowing you to manage more complex navigation flows. For example, you can navigate based on different models:
struct Task: Hashable {
    let id: Int
    let title: String
}

struct ContentView: View {
    @State private var path = NavigationPath()

    var body: some View {
        NavigationStack(path: $path) {
            List {
                Button("Go to Task 1") {
                    path.append(Task(id: 1, title: "Task 1"))
                }
                Button("Go to Task 2") {
                    path.append(Task(id: 2, title: "Task 2"))
                }
            }
            .navigationDestination(for: Task.self) { task in
                TaskDetailView(task: task)
            }
        }
    }
}

struct TaskDetailView: View {
    let task: Task

    var body: some View {
        Text("Task: \(task.title)")
            .navigationTitle("Task Detail")
    }
}
In this case, Task is a custom model, and we use it to navigate to different task details. NavigationPath is flexible enough to handle such models, making the navigation flow more dynamic.
Benefits of Using NavigationPath
- Dynamic Navigation: Unlike
NavigationLink, which requires static linking between views,NavigationPathallows you to define the navigation stack dynamically based on data or user interactions. - Programmatic Control: You can push, pop, and reset views on the stack programmatically, making it ideal for complex or nested navigation scenarios.
- Supports Custom Data Types: You can store and pass custom data models through the navigation stack, improving the flexibility and reusability of your views.


Be the first to comment