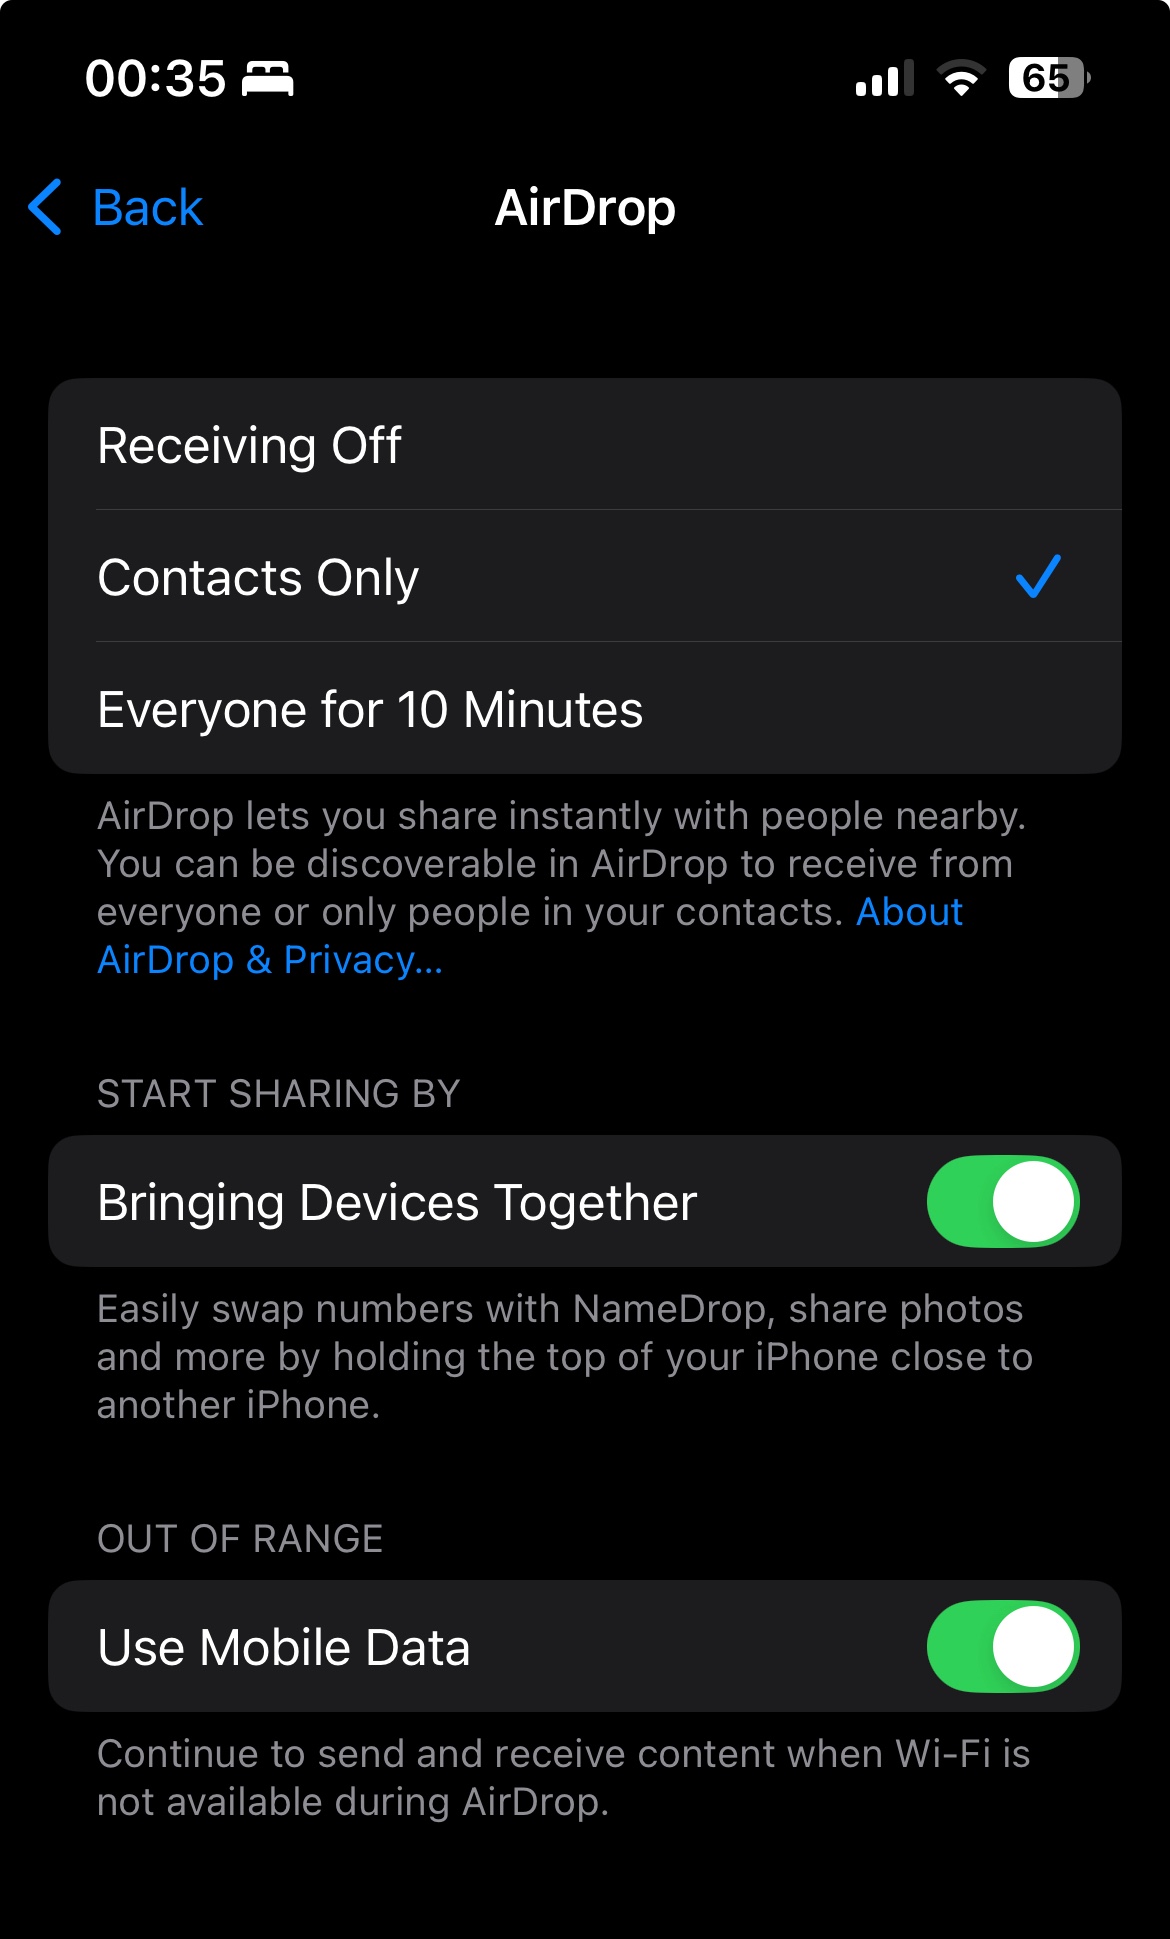
In our first article about lists we saw how easy is to create one and at the same time help our project with a better memory management. Now let's see how to create sections to allow us a better organization and distribution of content for our lists. Here you have an example of what you'll be able to create using sections:
As you can see in the example above, a section is composed of a header, a footer and the content of the section. Now we are going to build the list above from the ground. It all starts with the List view and then add the needed Section views.
struct ContentView: View {
    var body: some View {
        NavigationView {
            List {
                Section {
                    Text("Receiving Off")
                    Text("Contacts Only")
                    Text("Everyone for 10 Minutes")
                }

                Section {
                    Text("Bringing Devices Together")
                }

                Section {
                    Text("Use Mobile Data")
                }
            }
            .navigationTitle("AirDrop")
            .navigationBarTitleDisplayMode(.inline)
        }
    }
}
We are defining 3 sections that for now will only contains text.
Adding A Section Header And Footer
Sometimes we want to add more information to a section, like to give a name to a specific section in the list or add additional comments to help clarify what the section is meant for. In case we want to add this new information we are going to use header and footer.
List {
    Section {
        Text("Receiving Off")
        Text("Contacts Only")
        Text("Everyone for 10 Minutes")
    }

    Section {
        Text("Bringing Devices Together")
    } header: {
        Text("Start Sharing By")
    } footer: {
        Text("Easily swap numbers with NameDrop, share photos and more by holding the top of your iPhone close to another iPhone.")
    }

    Section {
        Text("Use Mobile Data")
    }
}
The appearance of the list sections will have diffent look depending of the .listStyle modifier
.insetGrouped, but you can choose between .inset, .grouped, .plain and .sidebar.

Be the first to comment